


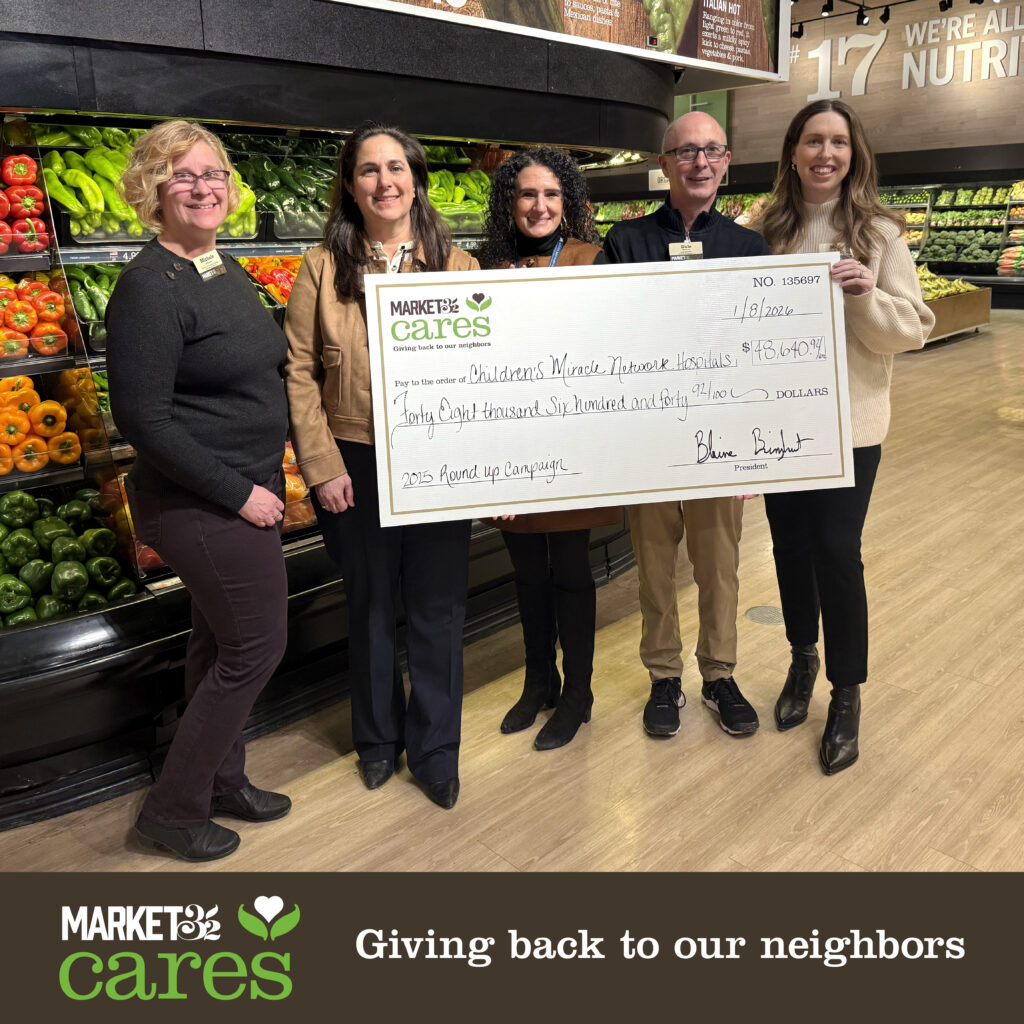
Market 32 and Price Chopper Raise Over $48,000 for Children’s Miracle Network Hospitals
Schenectady, N.Y. January 8, 2026 – Market 32 and Price Chopper today announced a total donation of $48,640 in support of Children’s Miracle Network Hospitals, made possible by the support of customers. The company’s month-long fundraising campaign in October—which raised $38,640—invited guests at all 129 stores to round up their change to the nearest dollar in direct support of pediatric care at 9 regional hospitals. Market 32 and Price Chopper added a $10,000 company match.
“The services provided by Children’s Miracle Network Hospitals are vital to families throughout our region,” said Blaine Bringhurst, president of Market 32 and Price Chopper. “Our guests consistently show their generosity and support. When that is combined with our ongoing commitment to investing in our communities, it helps ensure that children have access to the care they need close to home.”
170 children’s hospitals across the United States and Canada make up Children’s Miracle Network Hospitals, collectively providing 38 million patient visits for 12 million children each year. The following hospitals, serving communities within the Market 32 and Price Chopper footprint, are members of the network:
• Bernard & Millie Duker Children’s Hospital at Albany Medical Center (Albany, NY) • Boston Children’s Hospital (Boston, MA) • Connecticut Children’s Medical Center (Hartford, CT) • Geisinger Janet Weis Children’s Hospital (Mechanicsville, PA) • Maria Fareri Children’s Hospital (Valhalla, NY) • Mohawk Valley Health System (Utica, NY) • Samaritan Medical Center (Watertown, NY) • The University of Vermont Children’s Hospital (Burlington, VT) • Upstate Golisano Children’s Hospital (Syracuse, NY)
“We are grateful for partners like Market 32 and Price Chopper, whose continued support is absolutely instrumental in meeting the vital need for children’s healthcare,” said Kristen Schavemaker, Chief Programs & Foundation Partnerships at Children’s Miracle Network Hospitals. “In just two years, their generous guests have donated over $100,000 to support children and families treated at nine children’s hospitals. This commitment ensures that kids receiving care have access to state-of-the-art resources and essential services at their local hospital. “
Delicious Recipes to Stretch the Value of Your Holiday Ham
Well, just like that the holidays have passed just as quickly as they arrived. Now, what to do with all this ham!? Don’t worry, we’re here to stretch the value of your holiday ham with some delicious recipe ideas. So, you still get to enjoy delicious food, and nothing goes to waste. Check them out below!
Slow Cooker Split Pea & Ham Soup with Seasoned Croutons: Enjoy the comforting flavors of Slow Cooker Split Pea & Ham Soup, a hearty dish made with tender split peas, smoky ham, and fresh vegetables, perfect for chilly evenings. Topped with seasoned croutons for an added crunch, this easy recipe is a delicious way to warm up and feed the family.
Cuban Sandwich Pizza: Indulge in a delicious twist on a classic with Cuban Sandwich Pizza, featuring a crispy crust topped with savory pulled pork, ham, Swiss cheese, and tangy pickles. Drizzled with mustard and baked to perfection, this unique dish combines the beloved flavors of a Cuban sandwich into a fun and shareable pizza experience.
Dagwood Sandwich: The Dagwood Sandwich is a towering delight, packed with layers of deli meats, cheeses, and zesty condiments, making it a fun and indulgent meal for any sandwich lover. Named after the iconic comic strip character Dagwood Bumstead, this overstuffed creation is perfect for those looking to satisfy their hunger with a deliciously messy bite.
Breakfast Panini: Start your day right with a delicious Breakfast Panini, featuring a hearty combination of scrambled eggs, crispy potatoes, ham, and melted cheese, all nestled between toasted bagels or English muffins. This satisfying sandwich is perfect for a quick breakfast on the go or a leisurely brunch, delivering a burst of flavor in every bite.
Ham & Egg Cups Recipe | Price Chopper: Start your morning with Ham Egg Cups, a delightful and easy-to-make breakfast option that combines savory ham and fluffy eggs baked in muffin tins. Perfect for meal prep or a quick grab-and-go meal, these tasty cups are not only satisfying but also customizable with your favorite veggies and cheeses.
Ham & Avocado Toasts with Crispy Parmesan Eggs Recipe | Price Chopper: Indulge in Ham & Avocado Toasts with Crispy Parmesan Eggs, a deliciously satisfying dish that combines creamy avocado, savory ham, and perfectly fried eggs topped with a crispy Parmesan crust. This recipe is not only quick to prepare but also offers a delightful balance of flavors and textures, making it an ideal choice for breakfast or brunch.
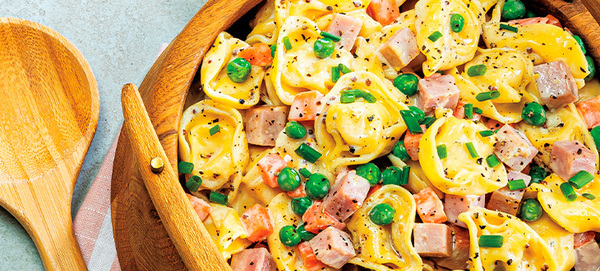
Tortellini Salad with Peas, Carrots and Ham Recipe | Price Chopper: Enjoy a refreshing Tortellini Salad with Peas, Carrots, and Ham, a vibrant dish that combines tender tortellini with sweet peas and crunchy carrots for a delightful texture. This easy-to-make salad is perfect for a light lunch or as a side dish at your next gathering, bringing a burst of flavor and color to your table.
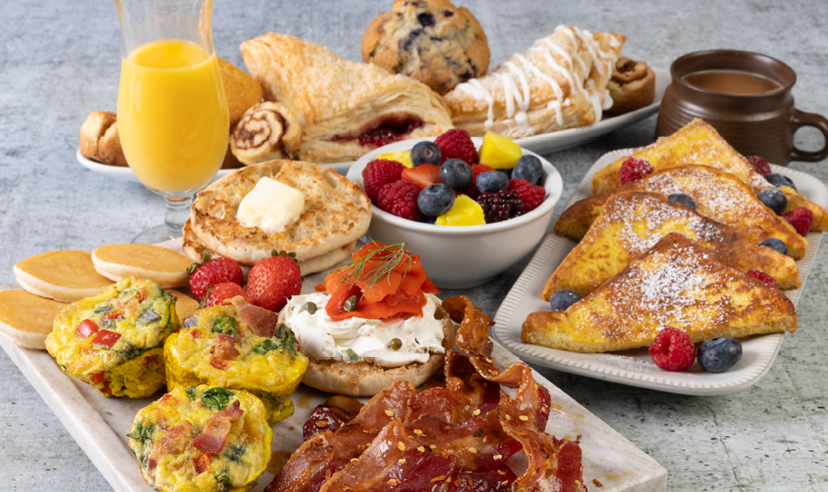
12 Recipes to Elevate Your At-Home Breakfast & Brunch
Picture this – it’s a cozy weekend morning at home. You get to sleep in and relax with the family. The only thing missing is a great dish to kick off the day. Well, you’ve come to the right place. Check out our 12 recipe ideas to elevate your at-home breakfast and brunch. See something that piques your interest? Give it a try!
Bacon, Tomato & Mushroom Strata
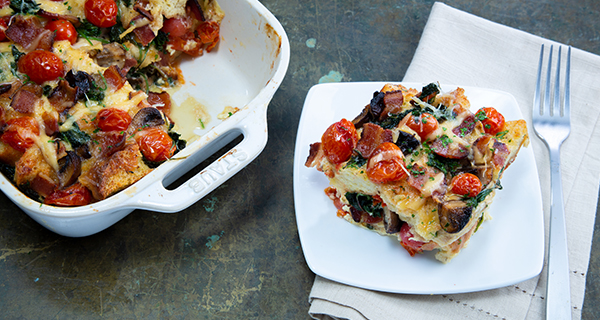
A strata is a savory breakfast casserole that layers bread, eggs, cheese, and various fillings. This Bacon, Tomato, and Mushroom Strata combines crispy bacon, sautéed mushrooms, and fresh tomatoes with Gouda and Parmesan cheeses, all baked to golden perfection.
Cottage Cheese Breakfast Bowl
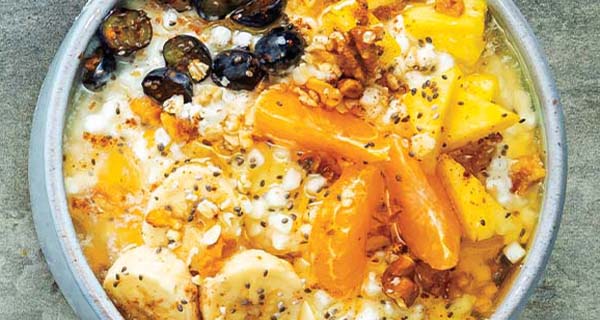
This Cottage Cheese Breakfast Bowl is a satisfying morning meal that combines creamy cottage cheese with a variety of toppings. It includes fresh fruits like blueberries and pineapples, nuts and seeds for added crunch, and a drizzle of honey or maple syrup for sweetness.
Blueberry-Stuffed French Toast
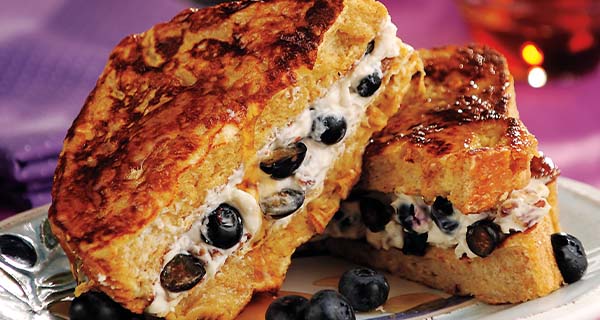
A delightful breakfast dish featuring layers of thick-sliced bread filled with a rich cream cheese and blueberry mixture. Perfect for brunch!
Egg Frittata Muffins

Egg Frittata Muffins are individual-sized baked egg dishes, like mini omelets, that are versatile and convenient for breakfast or brunch. They are made by whisking eggs with a variety of fillings such as vegetables, cheeses, and meats, then baking the mixture in a muffin tin until set.
Cinnamon-Walnut Crunch Coffee Cake
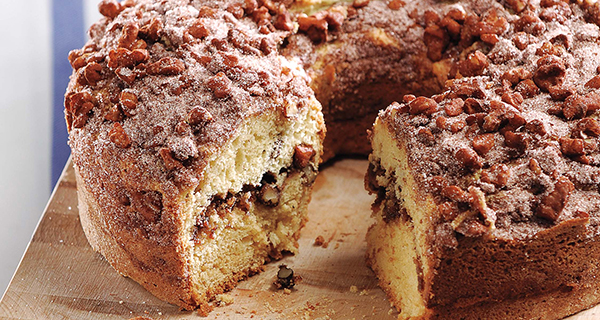
This Cinnamon-Walnut Crunch Coffee Cake is a moist and tender cake featuring a rich cinnamon-sugar swirl and a crunchy walnut topping. This delightful treat is perfect for breakfast or as an afternoon snack, pairing wonderfully with a cup of coffee.
Ham & Avocado Toast with Crispy Parmesan Eggs
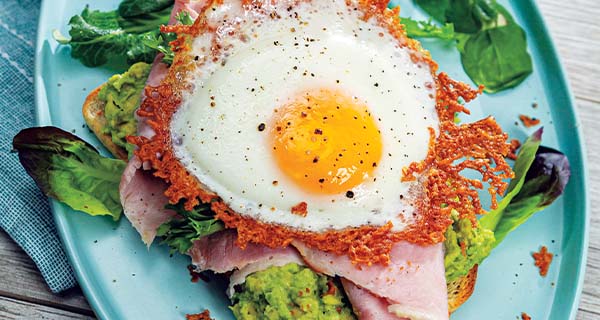
A savory breakfast dish that combines creamy avocado spread over toasted bread, topped with slices of ham and a crispy fried egg coated in Parmesan cheese. The Parmesan adds a flavorful crust to the egg, complementing the richness of the avocado and the saltiness of the ham.
Farmer's Market Hash with Poached Egg
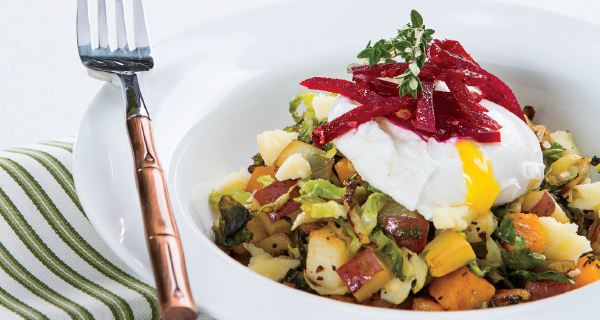
A hearty breakfast dish that combines a medley of fresh vegetables—such as butternut squash, Brussels sprouts, and potatoes—cooked until tender and golden. This flavorful hash is topped with perfectly poached eggs, allowing the rich yolk to mingle with the seasoned vegetables.
Heuvos Rancheros

Huevos Rancheros is a traditional Mexican breakfast dish featuring fried eggs served on lightly fried corn tortillas, topped with a flavorful tomato-chili sauce. Often accompanied by refried beans, sliced jalapenos, and fresh cilantro, this hearty meal offers a delightful combination of textures and bold flavors, making it a popular choice for breakfast or brunch.
DIY Glazed Donuts

Bring the joy of glazed donuts to your at-home menu with this fun recipe. Breakfast and brunch might never be the same.
Roasted Veggie & Bacon Sheet-Pan Frittata

A versatile and hearty dish that combines roasted bell peppers, onions, kale, and cherry tomatoes with crispy bacon and a savory egg mixture. The combination of roasted vegetables and smoky bacon provides a flavorful and satisfying meal suitable for breakfast, brunch, or even dinner.
Smoked Salmon & Scrambled Egg Bagel Sandwich
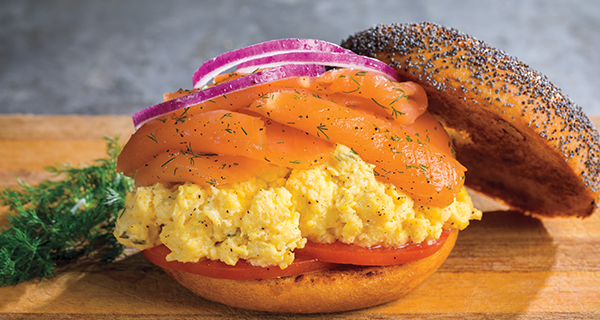
The Smoked Salmon Scrambled Egg Bagel Sandwich is a delightful breakfast option that combines creamy scrambled eggs with rich smoked salmon, all nestled between a toasted bagel. Elevate it with additions like chive and onion cream cheese, fresh tomato slices, and thinly sliced red onion, for a harmonious blend of flavors and textures.
Stuffed French Toast Rolls

Stuffed French Toast Rolls are a delightful twist on traditional French toast, featuring flattened bread slices filled with sweet or savory fillings, rolled up, and cooked until golden brown. These roll-ups make for a fun breakfast option that’s both easy to prepare and customize to your taste.
Market 32 and Price Chopper Transform Albany High School Food Pantry
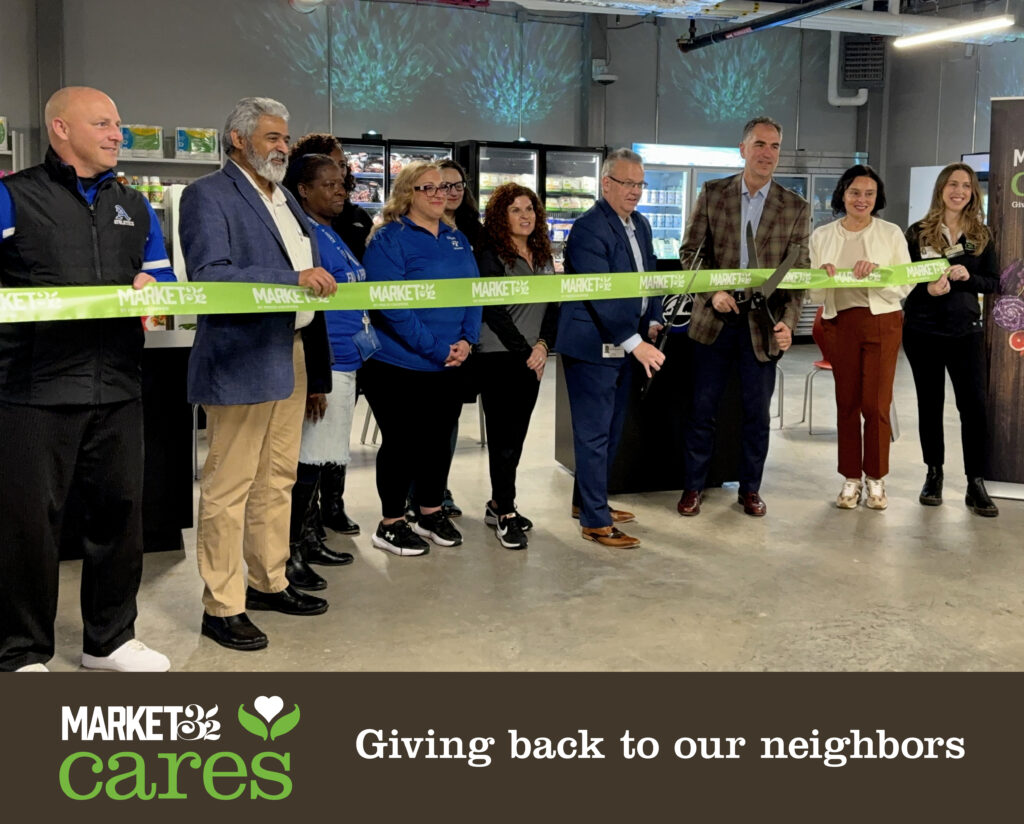
Schenectady, N.Y. December 12, 2025 – Through the Market 32 Cares initiative, Market 32 and Price Chopper, alongside the Albany City School District, today unveiled an expanded and enhanced food pantry at Albany High School. The newly named Falcon Market is now an inviting and thoughtfully designed space that will provide thousands of students with reliable access to fresh, no-cost food throughout the academic year. A ceremonial ribbon cutting marked the investment, valued at more than $15,000, in the well-being of one of the Capital Region’s largest school communities.
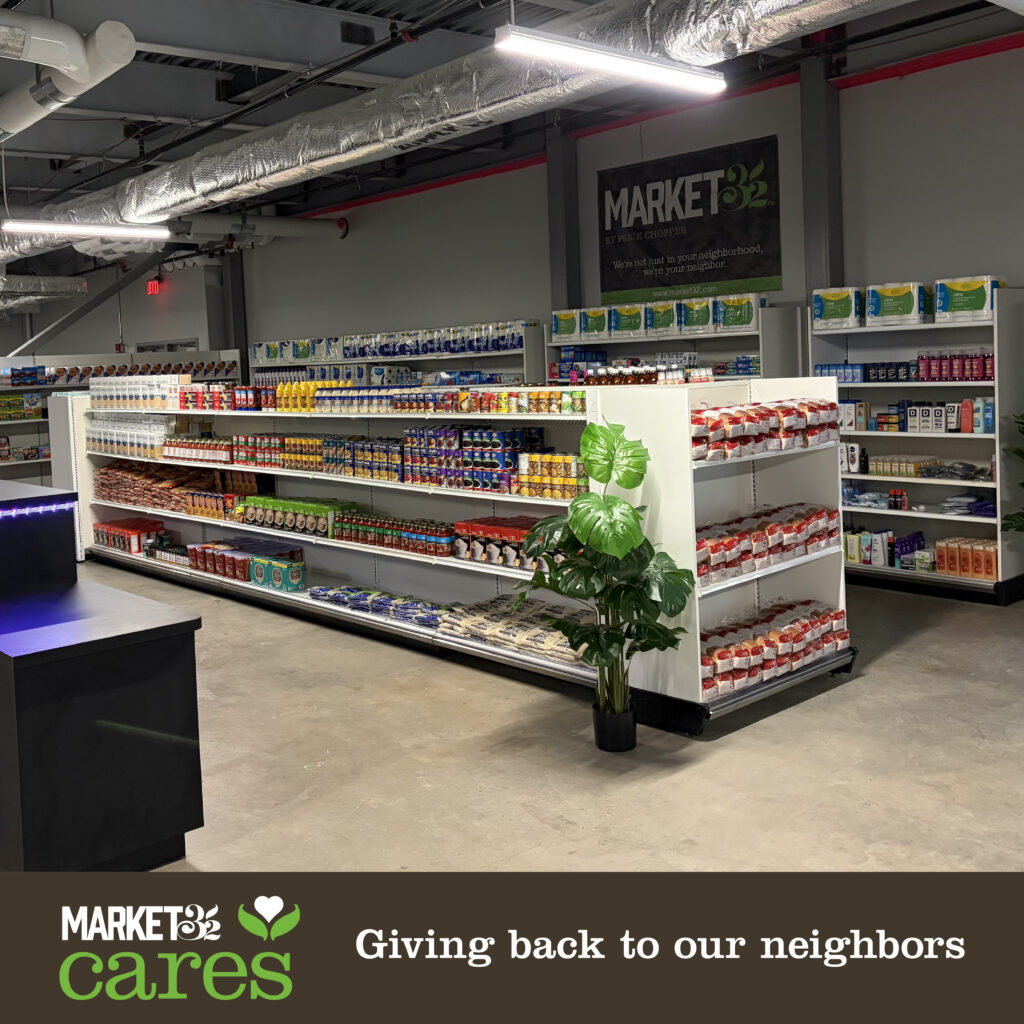
The transformed pantry—measuring approximately 1,135 sq ft—features extensive infrastructure donated and installed by Market 32 and Price Chopper, including two industrial-grade refrigeration units and built-in shelving. All related installation work was completed by the company’s design and construction teams, who volunteered their time and expertise. Corporate and store teammates also assisted in transporting items from the school’s original pantry and stocking the new space with a full pallet of shelf-stable products, also donated by the company.
There is also a designated “checkout counter”—used to help organize selections and support simple inventory tracking—which mirrors a familiar point-of-sale retail experience rooted in dignity and choice.
“This elevated pantry reflects what Market 32 and Price Chopper stand for: nourishing the neighborhoods we serve and supporting those who support one another,” said Blaine Bringhurst, president of Market 32 and Price Chopper. “We’re grateful for the opportunity to help Albany High School create a welcoming, retail-like environment where students can find the fresh food they need with comfort and respect—especially during the holiday season, when many families may be feeling added financial pressure. Our teammates were proud to roll up their sleeves to bring this vision to life.”
Co-located with Albany High School’s Falcon Boutique, which provides clothing, shoes, and household items free of charge, the pantry now forms part of an expanded resource hub designed to meet essential needs with dignity and ease. The room’s open layout, clean shelving, and increased capacity create a space that is organized and accessible for all.
“This is yet another shining example of the tremendous dedication our community partners offer to help us support our students and families,” said City School District of Albany Superintendent Joseph Hochreiter. “We are grateful to Market 32 and Price Chopper for this incredibly generous donation, which will help Albany High expand its efforts to address food insecurity and the financial stress many of our families face, especially at this time of year.”
With added refrigeration and storage capacity, the expanded pantry will offer a broader, more consistent selection of fresh foods, pantry staples, and ready-to-use essentials that support the daily nutrition needs of students. The improvements will enable Albany High School to serve more individuals, more often, in a space intentionally designed to convey care and compassion.
“These amazing donations from Market 32 and Price Chopper will significantly increase our school’s ongoing efforts to fill in the gaps for students and families in need,” said Albany High School Principal Jodi Commerford. “We are so fortunate to have this additional community support for our Falcon Market, which will allow us to do even more to address food insecurity, one of the most challenging obstacles any family can face.”
“When students are too hungry to concentrate, they cannot learn and meet their potential,” added Mari Shopsis, executive director of the Albany Fund for Education, also a community partner in supporting Albany High School’s food pantry. “The Albany Fund for Education has been working for more than 10 years to combat food insecurity in our schools and is very grateful to Market 32 and Price Chopper for joining us in this important work by completing this incredible renovation of the Albany High School pantry!”
The partnership builds on Market 32 and Price Chopper’s longstanding commitment to nourishing local communities and fighting food insecurity across its six-state footprint. Market 32 Cares, the company’s expanded community giving platform, continues its commitment to nourish neighborhoods by supporting health, well-being, and educational opportunities in the communities it calls home.
“We know that our students learn their best and achieve their full potential when they are prepared, this includes a healthy and nutritious diet,” said Veronica Ingram-Henry, vice president, programs and strategic initiatives at Regional Food Bank. “This expanded food pantry at the Albany High School is a great example of public, private, and non-profit collaboration, which allows us to truly have a positive impact in our community. We are proud to stand with Market 32 & Price Chopper and the Albany School District to support our neighbors in need.”


Haleigh Eustis
E-Commerce Marketing Coordinator
Happy December 12th! Did you know that today is National Poinsettia Day? These beautiful red flowers are a holiday staple, as their vibrant color and immense beauty bring life to any space you decide to place it! With the holiday season in full swing, shopping for endless amounts of friends, family, and even coworkers can tend to feel stressful and overwhelming. Poinsettia is a flower that stands for joy and celebration, which makes it the perfect gift for the loved ones in your life! Poinsettias are known for their staple red shades, but this Christmas flower comes in various colors including white, pink, burgundy, yellow, purple and more.
The poinsettia flower is native to the beautiful country of Mexico. These flowers have been cultivated for centuries and were used by the Aztecs for their natural red dye in clothing. As the years had passed, in 1827, botanist Joel Poinsett took a trip to Mexico where he had seen this beautiful flower. Upon his return to South Carolina, his home state, he brought a few Poinsettias to cultivate and very quickly this flower gained popularity within the states.
Though the Poinsettia is a largely popular holiday flower, you may be wondering how. The poinsettia flower stems from the Mexican legend of Pepita and her Christmas weeds. On Christmas Eve, a young girl named Pepita had no gift for her Christmas service. Encouraged by her cousin, she went to collect a bundle of weeds and placed them on a nativity set. Within seconds, the weeds were said to have bloomed into the beautiful Poinsettia flowers that we are familiar with today! Though these flowers are a seasonal plant in the states, they are the second most popular potted plant sold within a year.
Poinsettias are beautiful in all shapes, shades and sizes which is why Market 32 and Price Chopper have them readily available in our floral section during the holiday season. Shop in store for our beautifully arranged Poinsettias or use our online services, DoorDash and Instacart. Our online ordering allows customers to send personalized cardettes for any occasion which is sure to warm the hearts of whoever is receiving the potted plant!
Shop for the holiday season, stress free! Explore Price Chopper/Market 32 Floral Department for all your holiday gifts.
Quaker® Protein & Quaker® Fiber Instant Oatmeals
Busy mornings call for quick choices that help support your wellness journey. Whether you’re looking to support heart health, * support digestive health** or start your day with something warm and delicious, that’s where Quaker® Instant Oatmeal and Quaker® Fiber Instant Oatmeal come in. Perfect for busy schedules, workdays, or grab-and-go mornings, these convenient packets make it easy to enjoy your morning oatmeal. With no artificial flavors, colors or preservatives, these varieties share a nourishing foundation: they are made with Heart Healthy* 100% Whole Grain Oats*, and every serving brings you the warmth that oats have always offered.
*Diets rich in whole grain foods and other plant foods and low in saturated fat and cholesterol may help reduce the risk of heart disease
**Good source of fiber to help support a healthy digestive system.
Quaker® Protein Instant Oatmeal: Satisfying Fuel to Start The Day
Start your morning with a delicious bowl of Quaker® Protein Instant Oatmeal, crafted for those who want added protein from their bowl. The delicious flavors you love – now with 12g protein per serving. An excellent source of protein and a good source of fiber, it’s an easy option for your morning so you’re ready to take on the day.
Available in 2 delicious flavors; Cranberry Almond and Banana Nut. Cranberry Almond blends tart, chewy cranberries with crunchy almonds for a bright, satisfying bite, while Banana Nut delivers warm, bakery-inspired flavor with the taste of banana and nutty richness.
Quaker® Fiber Instant Oatmeal: A Delicious Way to Support Your Wellness Journey
If you’re looking for an easy, delicious option to help support digestive health, Quaker® Fiber Instant Oatmeal provides a tasty and easy way to get 35% daily value of fiber*. This includes 5g of prebiotic fiber from chicory root extract to help support healthy digestion. Why is it important? Fiber slows digestion, helping regulate blood sugar levels and helping to keep you feeling full longer.
*Based on a 2,000-calorie diet.
Available in Maple and Brown Sugar – a warm classic flavor with a delicious sweetness and hearty whole grain oats.
Whether you’re aiming to increase protein intake or increase daily fiber, Quaker’s instant oatmeal makes it easy with a variety of options. Quaker® Protein Instant Oatmeal gives you the protein you want on your active mornings. While Quaker® Fiber Instant Oatmeal provides a good source of fiber to help supports digestive health – both offering the warmth, taste and nutrition that makes oats a timeless favorite!

Market 32 and Price Chopper Announce Strategic Partnershipwith The University at Albany’s Danes of Greatness NIL Collective
Schenectady, N.Y., November 21, 2025– Market 32 and Price Chopper have announced a new partnership with Danes of Greatness’ Name, Image, and Likeness (NIL) collective, which was built to elevate and amplify the University at Albany men’s basketball program. The Capital Region’s neighborhood grocer will collaborate with the Danes of Greatness to create authentic connections between the athletes and fans, build brand affinity among the next generation of grocery shoppers, and make a difference in the community.
“We’re excited to launch this first-of-its kind partnership with UAlbany’s NIL collective,” said Pam Cerrone, Market 32 and Price Chopper director of community relations. “It’s what we like to call a win-win. Our collaboration with Danes of Greatness strengthens Market 32 and Price Chopper’s connection to the community by supporting local student athletes and fostering educational and professional development. It also expands our visibility through authentic marketing opportunities that highlight our commitment to healthy lifestyles and community involvement.”
Through the partnership, Market 32 and Price Chopper and Danes of Greatness NIL will co-develop and host events, in-store activations, and social media campaigns to further engage customers and fans while fostering student-athlete professional development, brand growth, and community engagement. This includes programs like “Shop with Your Favorite Player” events and “Wing DOG Wednesday” in-store product test tastings. Additionally, throughout the season, men’s basketball student-athletes will also support various Market 32 and Price Chopper customer outreach efforts through influencer-style content creation and social media collaborations, extending the athletes’ visibility beyond the arena and helping them gain invaluable hands-on experience outside the classroom in marketing, management, and other in-demand fields.
“We are pumped about the partnership with Market 32 and Price Chopper for this inaugural year of collaborating together,” said Chris Wyatt, Danes of Greatness founder. “Their mission to help people feed and care for themselves and their families is now connected through our UAlbany basketball program to support and amplify such a community-focused organization. This is another example where Danes of Greatness is able to encourage our student athletes’ growth within the community in even greater capacity off the court. Let’s continue to support the Capital Region. Go Danes!”
In addition to the NIL partnership, Market 32 and Price Chopper will sponsor an in-game promotional contest at all men’s basketball home games. One fan will be chosen to compete in a strategy test to win $150 in free groceries and help Market 32 and Price Chopper donate 1,000 meals to the Regional Food Bank of Northeastern New York, bolstering the company’s commitment to fighting food insecurity.
Danes of Greatness functions as an independent collective organized by a third party that facilitates NIL opportunities for student-athletes. It provides a structured, compliant platform to monetize their name, image, and likeness.

Market 32 and Price Chopper and News10ABC/FOX 23 Campaign for American Red Cross Disaster Relief Raises $87,798
Schenectady, N.Y., December 7, 2025 – Market 32 and Price Chopper and News10ABC/FOX 23 successfully concluded a two-month fundraising campaign to support American Red Cross disaster relief efforts, raising a total $87,798. Of these funds, $77,798 came through customer contributions at check-out at all 129 store locations, and Market 32 and Price Chopper supplemented their customers’ generosity with a $10,000 matching grant.
“Natural disasters can strike at any time, leaving communities in urgent need of help. It’s in those critical moments that we most need to be there for our neighbors,” said Blaine Bringhurst, president of Market 32 and Price Chopper. “We were honored to rally our teammates and customers to support the American Red Cross as it delivers lifesaving assistance to those most affected. This campaign would not have been successful without the committed partnership of News10ABC and FOX 23.”
The American Red Cross prevents and alleviates human suffering in the face of emergencies by mobilizing the power of volunteers and the generosity of donors. From hurricanes and floods to home fires, the Red Cross responds to nearly 64,000 disasters each year, and 95% of its disaster relief workers are volunteers.
“Every eight minutes, someone turns to the Red Cross for help—and as disasters big and small continue to impact our communities, that need is only increasing,” said Kevin Coffey, Regional CEO, American Red Cross Eastern New York Region. “From small house fires to large natural disasters, we go wherever we’re needed. We are profoundly grateful to Market 32 and Price Chopper, as well as their compassionate customers, for standing with us. Their belief in our mission and continued generosity allow us to bring help and hope to our neighbors when they need it most.”
Ron Romines, Senior Vice President, Regional Manager and Albany General Manager for News10ABC/FOX 23, said, “We believe in community and that means helping others where you can, when you can. We’re proud to partner with local groups that share this mindset to offer assistance to those in need.”

Bells are Ringing: Salvation Army Holiday Red Kettle Campaign Underway at Market 32 and Price Chopper
Schenectady, N.Y. December 2, 2025 – The familiar sound of holiday bells has returned to Market 32 and Price Chopper stores as they have once again partnered with The Salvation Army for its annual Red Kettle campaign. Through December 24, all 129 stores across New York, Vermont, Connecticut, Pennsylvania, Massachusetts, and New Hampshire will host the iconic red kettles to collect donations supporting neighbors in need.
The two organizations have worked hand in hand for more than 35 years to strengthen local communities during the holiday season and beyond. Last year, generous Market 32 and Price Chopper shoppers contributed over $618,000, helping to provide food, shelter, and essential assistance in the same communities where the donations were made.
“The annual Red Kettle campaign is a cherished part of the holiday season—both in our stores and in our communities,” said Blaine Bringhurst, president of Market 32 and Price Chopper. “It’s a privilege to open our doors to this tradition each year and support The Salvation Army’s mission of caring for our friends and neighbors in need.”
“It is only through the community’s generosity and partnerships like this one that we can respond to those in need 365 days a year through our services and programs,” said Major Michelle Dressler, Salvation Army Divisional Commander for the Empire State. “All funds raised during our annual Red Kettle Campaign stay local to make a real difference right here in our communities.”
The Salvation Army provides assistance to families and individuals throughout the year through food pantries, emergency assistance programs, after-school programs, music programs, pastoral counseling, and Christmas and toy assistance. Since 2010, Market 32 and Price Chopper and its generous customers have raised over $9 million through the Red Kettle campaign to support these initiatives.
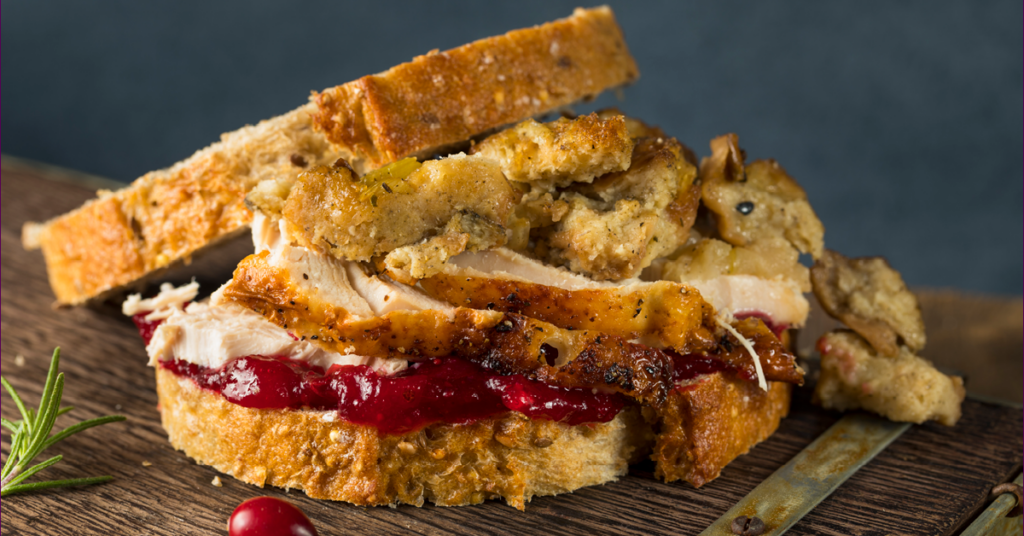
The Feast that Keeps on Giving: Delicious Leftover Recipes
Thanksgiving might just be the biggest food day of the year. It would be a shame if the food was limited to only one day. Luckily, we’re here to stretch the value of your Thanksgiving meal with a variety of delicious leftover recipes. Here’s some ideas to love your Thanksgiving leftovers until they are gone!
Turkey Pot Pie: Pot pie is a lovely comfort dish. Perhaps exactly what you need for the post-Thanksgiving blues before Christmas.
Roasted Buffalo Turkey: If you’re a fan of buffalo chicken, you’ll enjoy buffalo turkey just the same, maybe even more!
Open-Faced Turkey Melt: This Open-Faced Turkey Melt provides a yummy sandwich alternative for leftover turkey and cranberry sauce.
Cranberry Apple Stuffed Pork Chops: Stuffing like you’ve never used it before, this is an awesome choice for the leftovers that weren’t enjoyed on Thanksgiving.
Mashed Potato, Cheddar & Leek Casserole: Leftover mashed potatoes? Some cheddar cheese, bacon, and leeks will turn that into a nice casserole.
Leftover Turkey Pot Pie Roll Ups with Cranberry Mustard: These Turkey Pot Pie Roll-Ups are an excellent alternative to a whole pot pie, and the cranberry mustard is delicious.
Turkey, Cranberry, & Goat Cheese Quesadillas: Turn your turkey and cranberry into a quesadilla! Add a little goat cheese and this creative option works like a charm.
Loaded Leftover Soup with Stuffing Croutons: With leftovers, soup is always a winner. And this recipe works beautifully for post-Thanksgiving eats.