


Haleigh Eustis
Floral Intern
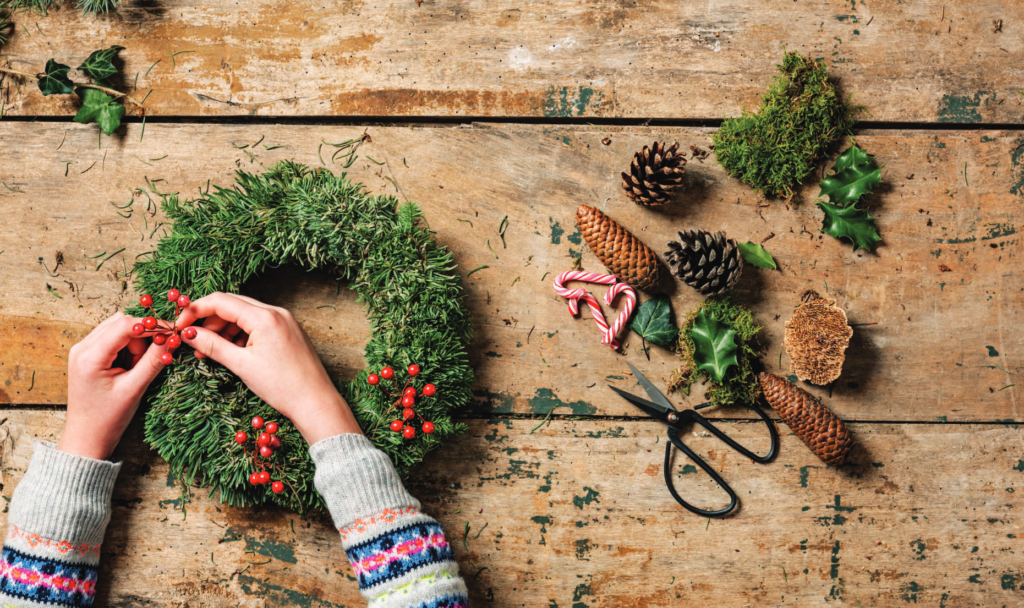
The holidays are right around the corner, which means flashy lights, colorful ornaments, shiny tinsel and blow ups of Frosty the Snowman will be in every direction that you turn! Though the flashiness of the decorations can be beautiful, sometimes you may want to go back and just enjoy the simplicity of a natural green wreath.
Wreaths are a beautiful and classic decoration that can be adorned on windows, doors, fireplaces and practically anywhere you can think of. That being said, as beautiful as wreaths are, they can tend to look a bit plain if you’re not a fan of the all-natural look.
But, what if you still want a natural looking wreath with decorations that aren’t flashy? We can help! Decorating a holiday wreath doesn’t have to be boring. Use items from around your house to create a beautifully unique wreath that will catch the eyes of anyone.
We’re going to make two different types of garland to wrap around your beautiful wreath with supplies that you can find in your house, or yard!
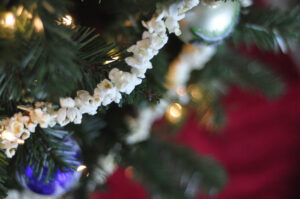
Garland One: a classic garland strand that is easy and delicious to make! All you need is popcorn (preferably not buttered) and cranberries. This is a classic staple to any holiday time décor . . . and it’s easy to make as well. Pop your popcorn and have thread and a sewing needle at the ready. Once you have acquired your ingredients, lace your popcorn and cranberries in any pattern that you like. The great part about garland is that it’s all up to you! Design and create the perfect strand of garland that will look great on your wreath.
Garland Two: this is a strand of garland that is a bit more difficult to create, but still equally as beautiful. All you need are dried oranges, cinnamon sticks, small pinecones and twine. You may be asking; how do I make dried oranges? Don’t worry, it’s simple:
Take an orange (preferably naval, or blood orange) and cut it into various wheels. Pat your citrus dry with a paper towel and arrange on a baking sheet. Now this is the boring part . . . place the sheet in the oven at 170 degrees for six to seven hours! Rotate the baking sheet every two to three hours to prevent burning. This is a tedious step, but it will ensure completely dried oranges and a wonderful smelling home!
Now, take your dried oranges and weave twine in and out its dried flesh (be careful not to tear anything).
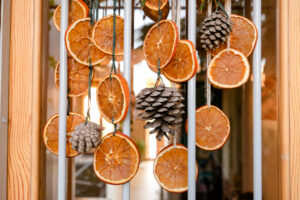
Now that we have dried oranges, it’s time to put everything together! Use your twine and–to your liking–combine your cinnamon sticks, pinecones and oranges.
Making decorations for the winter season is easy. There are plenty of ingredients and supplies to make exciting and eye-catching wreaths for the whole winter season!
Buy all your wreath needs at Price Chopper/Market 32!

Haleigh Eustis
Intern, Digital Marketing
I was going to tell you a joke about the solar eclipse, but I figured it would be overshadowed by better ones! This year, on April 8th, we will experience a solar eclipse! A solar eclipse happens when the Moon moves between the Earth and the Sun, blocking the Sun’s light temporarily. It’s like the Moon is standing in front of the Sun, casting a shadow on Earth. This makes it look like the Sun is disappearing for a little while. It’s a fascinating event where the Moon hides the Sun from our view for a short time!
If you’re looking forward to witnessing this thrilling occurrence, it’s essential to complement it with a delectable dessert. Enhance your solar eclipse experience with moon cookies – not only are they irresistibly delicious, but they’re also easy to make.
What You’ll Need:
- DRY INGREDIENTS:
- 2 Cups of All-Purpose Flour
- ¾ Cup Unsweetened Cocoa Powder
- 1 Teaspoon of Salt
- ½ teaspoon Baking Powder
- WET INGREDIENTS
- 1 Cup of Granulated Sugar
- ½ Cup of Unsalted Butter
- 1 Large Egg
- 1 Teaspoon Vanilla Extract
- 1 Cup of Milk
- FROSTING
- 2 Cups of Powdered Sugar
- ½ Cups of Unsalted Butter
- 2 tablespoons of Milk
- ¼ Cup of Unsweetened Cocoa Powder
Let’s Begin:
- Combine all dry ingredients together.
- In a new bowl, combine sugar and softened butter and beat on medium until light and fluffy. Once fluffy, add your egg, vanilla and beat for one more minute.
- Once combined, alternate between mixing in your milk and dry ingredients into your wet ingredients bowl.
- With your cookie dough, create 12 balls on your baking sheet and freeze the dough for 10 minutes. Once frozen, bake your cookies for 12 minutes at 350 degrees Fahrenheit.
- While your cookies are cooling, combine your frosting ingredients (don’t utilize your cocoa, yet!) in a bowl on medium-low for three minutes. Once your frosting is smooth and incorporated, divide the frosting into two bowls and mix in your cocoa in one bowl.
- Lastly, frost one half of your cookie with the chocolate frosting, and the other half with your original frosting.
There you have it! Delicious cookies for your solar eclipse watch party! Buy all your moon cookie ingredients at Price Chopper/Market 32!
Haleigh Eustis
Intern, Digital Marketing
Happy Mardi Gras! This popular holiday is celebrated by many and is widely known for its extravagant and lively celebrations in New Orleans! This celebration is filled with food, parties, drinking and lively celebrations that take up the entire city. When one thinks of Mardi Gras, there are three colors that should come to mind: green, purple and gold (or yellow!) The colors were chosen by Rex, King of the Carnival and all represent different symbols. Purple stands for justice, while green stands for faith and gold stands for power. Though this celebration has little to do with flowers, that doesn’t mean we can’t add our own unique take on it! In this blog we’re going to make a DIY Mardi Gras bouquet that is sure to add a little color in your space!
Mardi Gras has been celebrated since the 18th century and has never ceased to bring celebration and enchantment every year. That said, we’re going to make a bouquet that mimics the same excitement that comes with the holiday and celebrations! What you’ll need:
- Medium height vase
- Party beads (specifically in purple, green and gold shades)
- Flowers
- Purple flowers that I recommend: lilac, purple daisies, lavender or hyacinth!
- Greenery of any kind but I have a strong preference for ivy, leather fern, silver dollar eucalyptus, baby blue and baby’s breath! (You can also use statice for some more purple flare.)
- Though there are no natural gold flowers, there are yellow flowers! Here are some I recommend! Sunflowers, marigolds, tulips, chrysanthemum, goldenrod and the primrose!
- (Optional) ribbon!
Let’s begin:
Step One: Start with your vase. You’re going to want to fill it with your Mardi Gras themed beads. There doesn’t have to be any order to this, do what you like!
Step two: Once the vase is filled with beads start to create your bouquet! If you’re not confident in your bouquet making skills, we have a blog that will help you, click here! Don’t forget, because there’s no water in your vase, your flowers are more prone to die faster! If you want to prolong their life, nestle a small glass into your vase and place your bouquet in the cup with water. Then you work around your cup and use the beads to hide it! Make this bouquet as extravagant as you want!
(Optional): You can always add feathers and Mardi Gras masks to the bouquet as well!
Step Three: now that you have your finished bouquet, you can wrap a beautiful ribbon around the vase and voila! You’ve got a beautiful and easy to make Mardi Gras bouquet!
Buy all your floral needs at Price Chopper/Markert 32 Floral Department!

Haleigh Eustis
Intern, Digital Marketing
Happy Winter! This time of year can tend to drag on as the days are shorter, temperatures are colder, and people wait patiently for the first signs of spring. That being said, there are plenty of activities to keep yourself occupied as the cold weather thaws away slowly. Easy for all ages to make; let’s create bottle cap snowmen ornaments!
What you need:
1. (3) bottle caps for each snowman
2. White paint
3. Black and orange paint pens (sharpies work too)
4. Small pom-poms (choose any color you’d like)
5. Sheets of felt material (choose any color you’d like)
6. Hot glue gun (glue sticks work too but with better results glue guns are preferred)
7. Winter or holiday ribbon
8. Small buttons (choose any color you’d like)
Let’s begin:
- Before we begin, assemble your ornaments pieces. With your colorful felt you can cut and create small hats, and scarves for your snowman. It’s simple. Just cut out 2D shapes of winter beanies and strips of felt (6/8 inches) for your scarves.
- You will glue those to the front of your snowman.
- Cut your holiday ribbon to a length that is suitable for your liking. Remember, this is going to be used to hang your ornament, so whatever length you cut make sure it’s enough when folded.
- With the bottle caps, you’re going to paint the entirety of it white, front and back! This task may feel tedious, but you’re going to want to repeat this if the white paint is streaking on the first coat. Wait until the paint is completely dry to continue.
- Once your paint is dry, take your markers and draw on the snowman’s eyes, coal and nose.
- Now, assemble all of your pieces together. Start simple: hot glue all your bottle caps together. Glue as you would a chain, from top to bottom, not back-to-back.
- Next, hot glue your ribbon to the back of the snowman’s head. Make sure it’s shaped like a loop so it can hang on hooks or branches!
Make the most of this snowy winter with fun at-home activities!

Mia Teal
Marketing Coordinator, Paid Media
The Christmas holiday is a beautiful time of year. For many people, ornaments are continuously collected from their children while in grade school, family trips, and other memories throughout the years. No matter your age, you are never too old to create an ornament to hang on the tree. Let’s take a look at making meaningful ornaments with food that you can purchase right at your local Price Chopper and Market 32 store. This is a great family activity that will bring laughs and beautiful memories.
Salt Dough Gingerbread Men
As the name suggests, these gingerbread men are going to be salty, so not ideal for eating! They are, however, ideal for ornament-making. The salt helps preserve the ornaments. After all, these gingerbread men are made for hanging on the tree – not for eating!
What you will need:
1/4 cup ground ginger
1/4 cup ground cloves
1 cup salt
3 cups flour
1 1/2 – 2 cups water
Parchment Paper
Baking Pan
Twine/ribbon/string
1 straw
Directions:
Mix dry ingredients together & slowly add the water. Roll the dough so that it is about 1/4 inch thick and create your desired shape. Use a straw to poke a hole in the top for the string later on. Bake at 250°F for 1-2 hours and let cool. Once dried, decorate and hang!
Melted Peppermints
This craft is simple, yet intriguing! You can use red or green peppermints here, or even a mix of both!
What you will need:
Peppermint Candies
Cookie Cutter
Parchment Paper
Toothpick/straw
Twine/ribbon/string
Directions:
Line a cookie sheet with cookie cutters of choice, and spray the inside of each cutter. Line the peppermints inside the cookie cutters and bake at 350°F for 3-9 minutes, but please pay attention to how quickly they are melting. Once the candies have melted together, remove from the oven. Gently use a toothpick or straw to poke a hole in the top of the ornament and let them completely harden. Remove the cutter from melted mints and hang!
We wish you a safe & happy holiday season!
Haleigh Eustis
Floral Intern
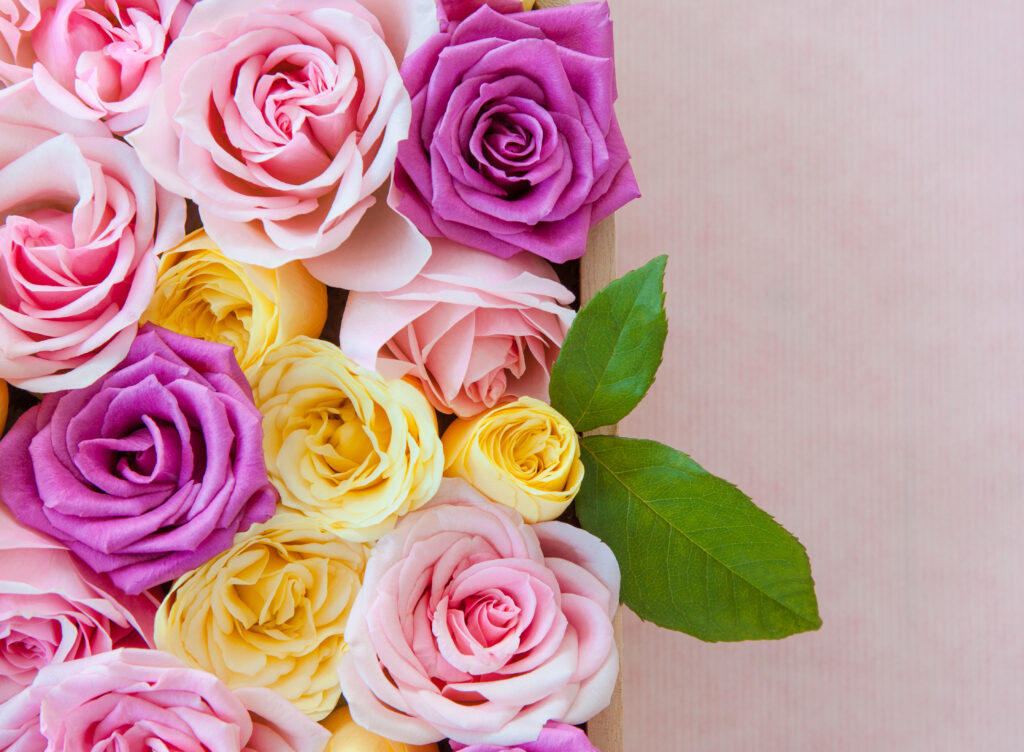
Wedding season is in the air! A magical day filled with beautiful dresses, delicious desserts, stunning décor and . . . flowers! With every wedding comes the important decision: What flowers are going to be used to create your picture-perfect day?
Brides have been known to carry bouquets to ward off bad luck on their special day. Whether you believe this, or you just think they look pretty, a floral bouquet is an elegant way to add some personality to your wedding.
As the years have passed, it’s become more common for brides to create a beautiful bouquet of flowers that’s perfect for their liking. Though this may seem like an easy task, there are proper steps that go into bouquet assembly to create the most attractive bundle of flowers. If you’re planning on DIYing your own bouquet for wedding season, here’s a helpful guide to get you started!
To create a beautiful bouquet, focus on four key elements: focal flowers, fillers, linear flowers, and volume focal flowers. Each element will ensure a lively and stunning bouquet that will impress your guests!
Focal Flowers: A focal flower is, essentially, your base. Usually, a base is created from one to three flowers. From there, you create a bouquet that is centered around those flowers. The focal flower(s) is the crème de la crème of your bouquet! Normally focal flowers are larger in size and the most attractive flower of your bouquet. Examples of popular focal flowers: roses, hibiscus, and sunflowers.
Fillers: A filler usually is something that is used to cover or fill unwanted or awkward gaps. It may add color contrast to the bouquet, but essentially, it is aiding the focal flower! Popular fillers: baby’s breath and eucalyptus. Small and easy to find, fillers are wonderful for creating dimension and texture.
Linear Flowers: Though it’s not necessary, a linear flower(s) is a quirky addition to add flare in a bouquet. Linear flowers are used to add height, which may not always desired. Popular linear flowers: campanula, snapdragons, and gladiola. Linear flowers are an easy way to add texture and dimension to a bouquet. But be careful! Too many linear flowers could take away from your actual focal flowers. Utilize linear flowers graciously.
Volume Focal Flowers: Last, but definitely not least, volume focal flowers! These are meant to bring the entire bouquet together nicely. Volume focal flowers consist of small bundles of beautiful flowers. Typically, these flowers should be simpler. They accent–but don’t take away from–the focal flower(s)!
Creating a beautiful bouquet doesn’t have to be stressful! Follow this guide and anyone can create a showstopping flower creation effortlessly. To alleviate wedding stress, shop Price Chopper/Market 32 Floral Department for all your unique floral needs. Good luck!