


The first week of November is here, and the cold air may have us cooking warm meals. Whether you’re looking for something cozy, creamy, or fresh, these three chicken dishes have you covered! From a hearty soup to a rich pasta dish and a tangy Mediterranean-style chicken, these recipes are perfect for any occasion.
Let’s dive in!
Lemon Orzo Chicken Soup
Market 32 Chicken Breast (buy one get one FREE!)
1 bag Market 32 Carrots
2 containers Swanson Broth
1 Lemon
1 Onion
Celery
1 box PICS Orzo
Shop for Lemon Orzo Chicken Soup here!
Greek Yogurt Marinated Chicken Breast with Roasted Carrots & Potatoes
Market 32 Chicken Breast (buy one get one FREE!)
1 container (32oz) PICS Greek Yogurt
1 bag Pita Bread
1 clove Garlic
1 Lemon
1 bag Market 32 Russet Potatoes
1 bag Market 32 Carrots
Shop for Greek Marinated Chicken Breast here!
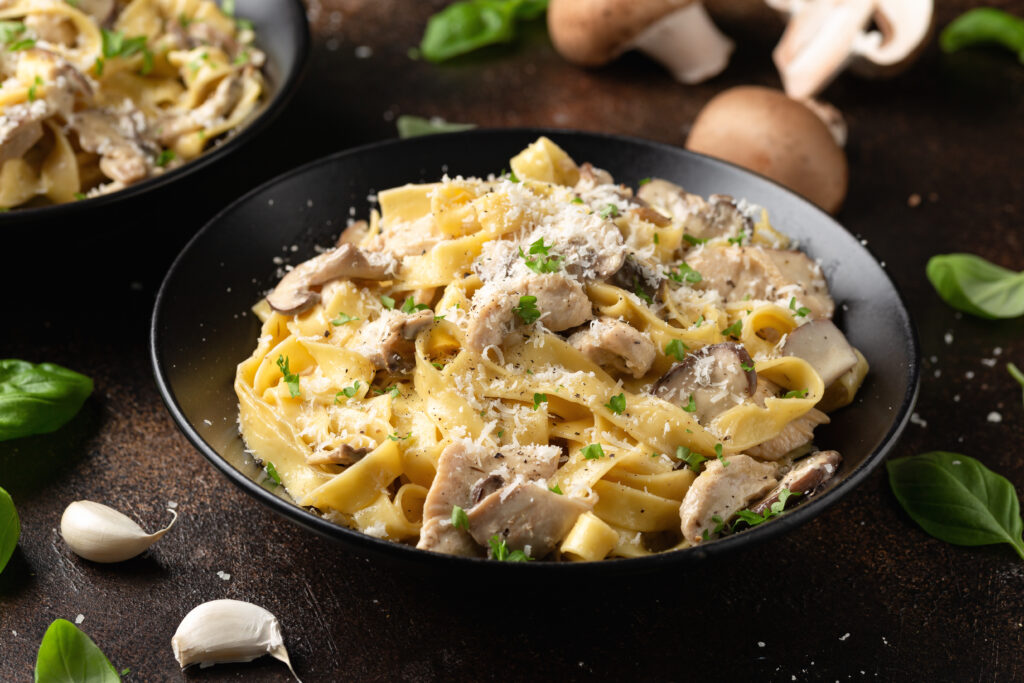
Chicken Alfredo Pasta
Market 32 Chicken Breast (buy one get one FREE!)
1 box PICS Pasta
1 jar Prego Alfredo Sauce
1 crown Broccoli
Shop for Chicken Alfredo Pasta here!
Looking for more ideas? Check out this Antipasti Chicken Alfredo recipe!
Finding easy, delicious meals to cook on busy weeknights can be a challenge, but ground beef is the perfect solution! It’s versatile, budget-friendly, and cooks up quickly, making it a go-to ingredient when you need to get dinner on the table fast. Whether you’re craving something hearty, comforting, or a little more creative, these three ground beef recipes are sure to satisfy.
Let’s check out our menu…
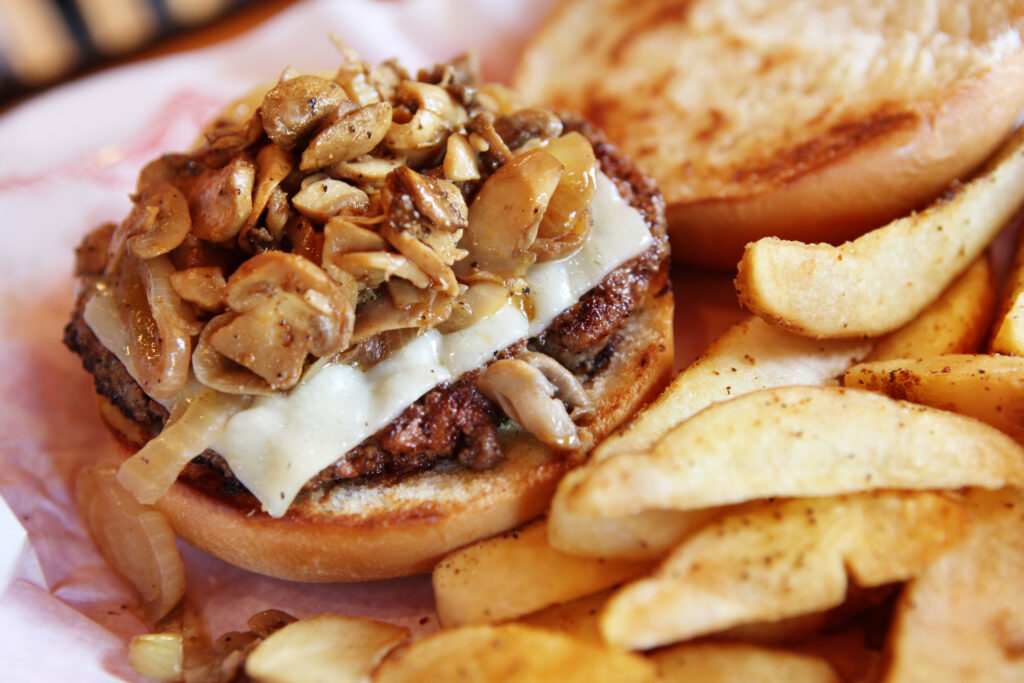
Mushroom Swiss Burger
1 lb. Market 32 85% Lean Ground Beef
1 Vidalia Onion
1 package Market 32 Baby Bella Mushrooms
1 pack PICS Hamburger Buns
1 pack PICS Swiss Cheese
1 bag McCain French Fries or Onion Rings
Shop for Mushroom Swiss Burgers here!
Beef Tacos
1 lb. Market 32 85% Lean Ground Beef
1 Old El Paso Taco Kit
2 Avocados
1 bag (8oz) PICS Shredded Cheese of choice
1 bag Shredded Lettuce
Shop for Beef Tacos here!
Beef Nachos
1 lb. Market 32 85% Lean Ground Beef
1 Avocado
1 Vidalia Onion
1 bag Market 32 Tortilla Chips
1 can PICS Black Beans
1 can PICS Diced Tomatoes
1 container PICS Sour Cream
Shop for Beef Nachos here!
Looking for more inspiration? Check out this recipe!
Mia Teal
Marketing Coordinator, Paid Media
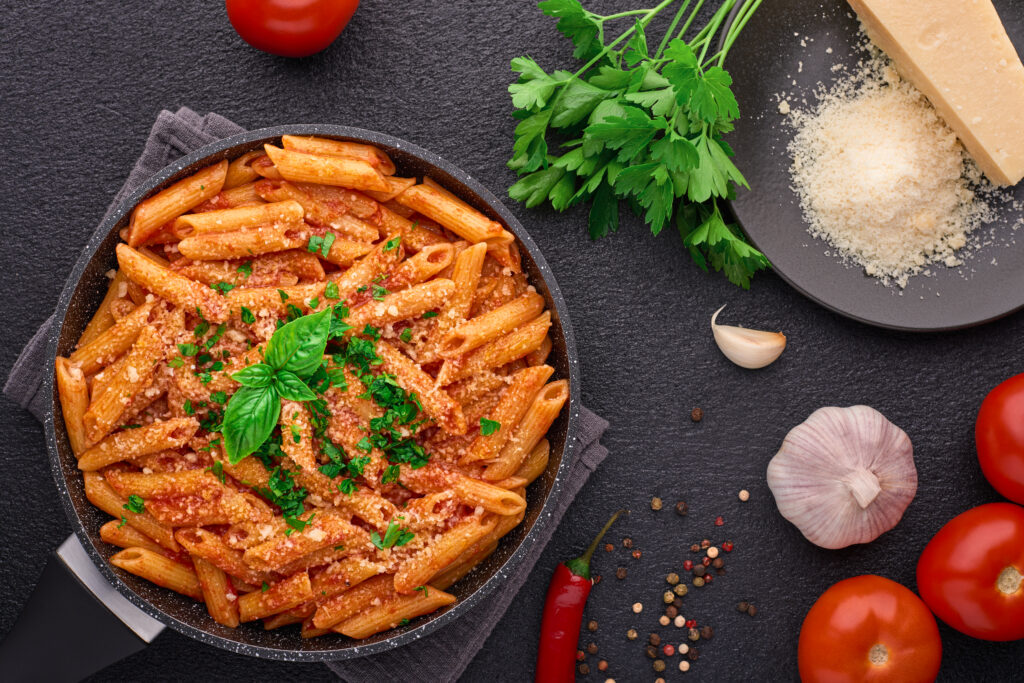
Italian food is more than just a meal; it’s a celebration of culture, tradition, and the joy of simple yet flavorful ingredients. When you think of Italian cuisine, images of rustic bread, fresh pasta, rich tomato sauces, homemade pizza, and olive oil likely come to mind. From hearty lasagna to delicate pastries, Italian dishes have captured hearts and appetites across the globe.
At Price Chopper and Market 32, we are proud to offer a variety of Italian recipes on our website, as well as everything you need for these in our stores. Be sure to check out more about our Italian products here!
Let’s take a tour of Italy with these fresh recipes to try at home!
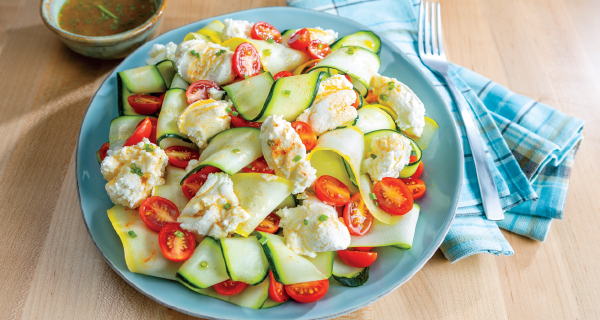
Ricotta Toast Bowl: Made with the finest ingredients, this bowl will have you feeling full and satisfied.
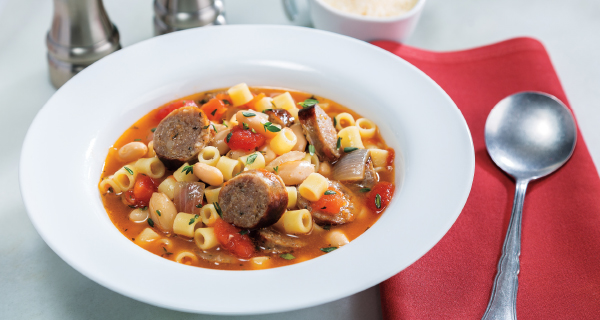
Pasta Fagioli: Warm up on a cold day with a hearty bowl of Pasta Fagioli!
Italian Antipasti Salad: Enjoy a delicious array of vegetables, meat, and cheeses in this salad.
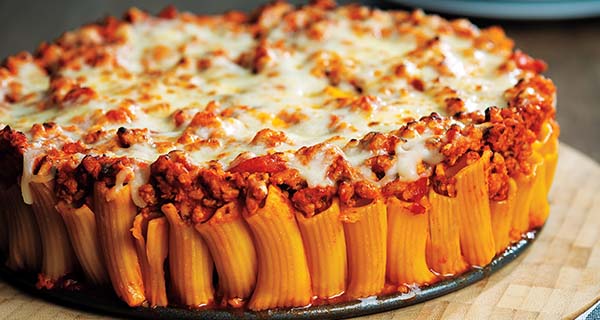
Rigatoni Pie: This dish is exactly what it sounds like. This recipe is essentially a baked pasta casserole that looks like a savory “pasta cake.”
Check out more recipes on our YouTube Channel!
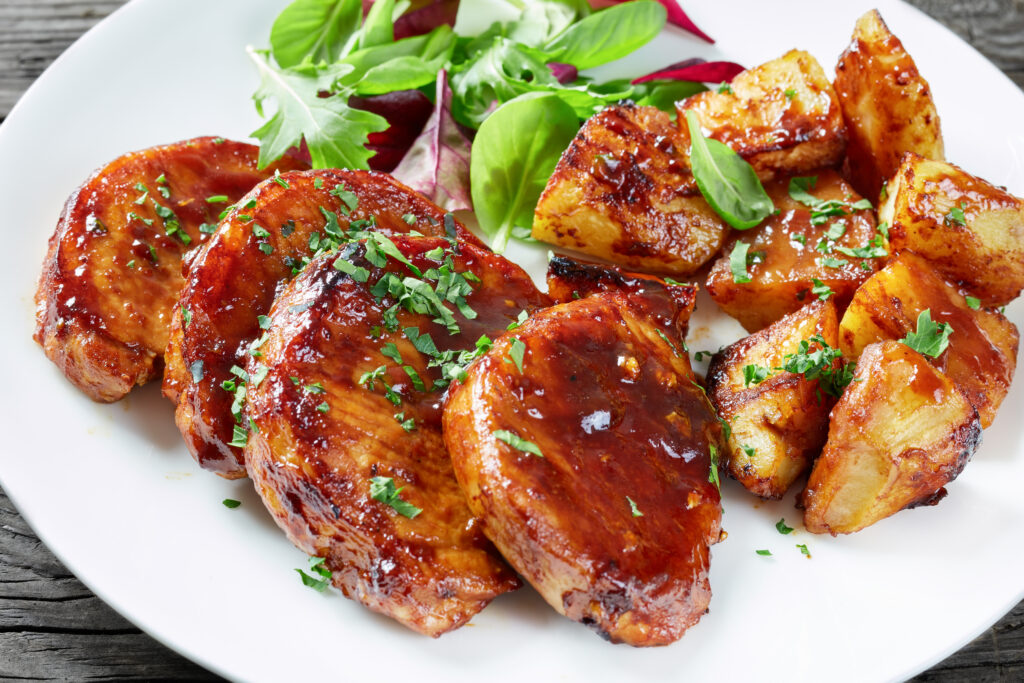
On today’s episode of “Value Meals,” we are bringing you a classic recipe and a twist on an old favorite. Introducing the Cuban Sandwich and Smoked Pork Chops with a Pear Glaze. Both meals only have five ingredients. You can’t beat simplicity AND flavor!
Cuban Sandwiches
Market 32 Boneless Center Cut Pork Loin Chops
1 pack Market 32 Sub Rolls
1/2 lb. Dietz & Watson Ham
1 jar PICS Pickles
1 package PICS Swiss Cheese
Shop Cuban Sandwiches here!
Smoked Pork Chops with Pear Glaze
Market 32 Boneless Center Cut Pork Loin Chops
1 Onion
1 bag Market 32 Russet Potatoes
1 Pear
1 can PICS Chicken Broth
Shop Smoked Pork Chops with Pear Glaze here!
Change up your Cuban Sandwich!
Must be 21+ to enjoy.

Mia Teal
Marketing Coordinator, Paid Media
July is National Picnic Month!
Picnics encompass far more than simply enjoying tasty food; they involve gathering friends and family together to embrace the beauty of the outdoors. The warm sun hitting your face while simultaneously smelling the bright flowers awakens the senses and brings joy from one person to the next.
This being said, it’s time to plan your next picnic! Let’s take a look at some local parks to have a picnic as well as delicious recipes for you to make!
New Hampshire
(Colburn Park link takes a minute to load!)
Once you have your picnic location, it’s time to plan what you will bring. Check out some ideas from our recipes site below!
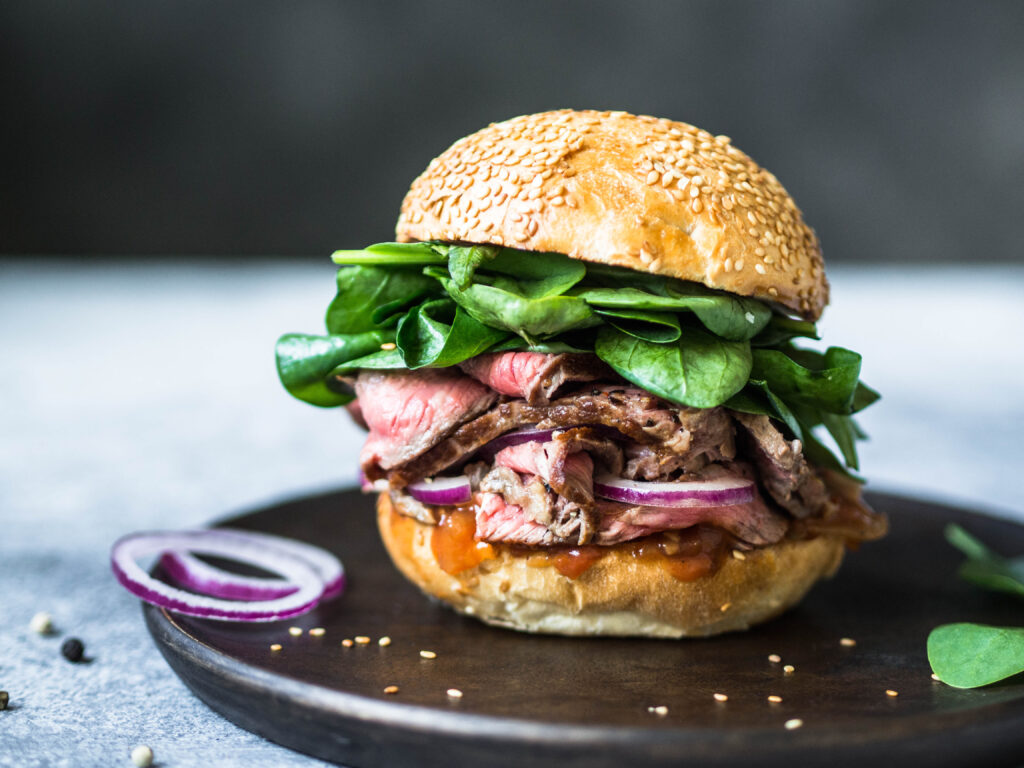
Picture this: tender slices of grilled steak nestled between two slices of toasted artisan bread, perhaps with a smear of garlic aioli or a tangy steak sauce. Sounds incredible, right? Now picture a fun fiesta of a fresh bed of lettuce, ground turkey, beans, & corn. Sounds amazing, right?
What if we told you these Steak Sandwiches & Taco Salads only have five ingredients? Easy and delicious! Let’s check out this week’s items to make these recipes…
Taco Salads:
1 package Ground Turkey (Buy one get one FREE!)
1 can (16oz) PICS Black Beans
1 can (16 oz PICS Canned Corn)
1 package PICS Taco Seasoning
Shop for Taco Salads here!
Steak Sandwiches:
1 package Certified Angus Beef Steak (Buy one get one FREE)
1 package RealSweet Vidalia Onions
1 container Market 32 Whole White Mushrooms
1 bottle PICS Marinade
1 pack Market 32 Rolls (found in bakery section)
Shop for Steak Sandwiches here!
Check out this fun twist on your steak sandwich!
Summer is the perfect time to fire up the grill, gather with friends and family, and indulge in delicious, hearty meals. This week, we are bringing you a traditional burger recipe, along with a nacho appetizer and meatball sub for lunch. Better yet, Market 32 80% Ground Beef Mega Pack is on sale this week only!
Let’s see what ingredients we have on the menu…
Burgers & Beans!
1 lb. Ground Beef
1 pack PICS Hamburger Buns
4 ears Corn
1 can (16oz) PICS Baked Beans
Shop for Burgers & Baked Beans here!
Hearty Meatball Subs!
1 lb. Ground Beef
1 pack Market 32 Hoagie Rolls
1 jar Ragu Pasta Sauce
1 bag (8oz) PICS Mozzarella Cheese
Shop for Meatball Subs here!
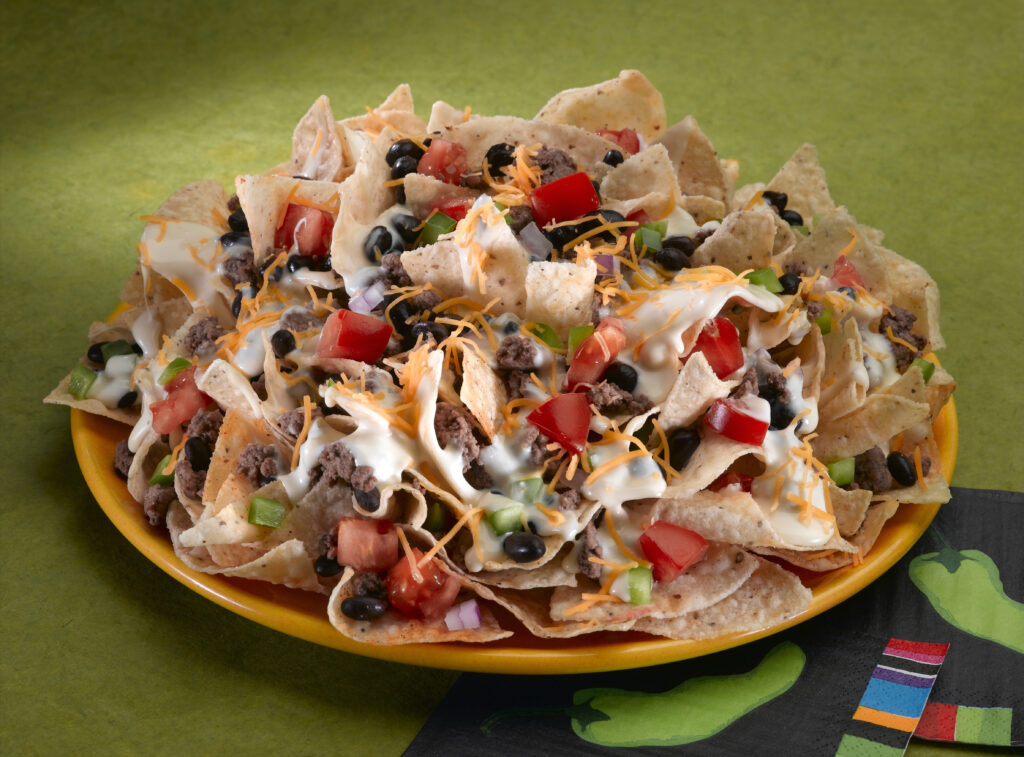
It’s Nacho Time!
1 lb. Ground Beef
1 bag (8oz) PICS Mozzarella Cheese
1 bag On the Border Tortilla Chips
1 jar (16oz) PICS Salsa
1 can (16oz) PICS Canned Black Beans
Shop for Nachos here!

Grilling days are on the menu! We have some ideas you and your family will love, while you are loving eating more meals with your family. Warmer days also mean grilling outside can keep inside cool and comfortable.
Let’s check out this week’s meal planning items.
Sausage & Peppers:
1 pack Market 32 Sweet or Hot Italian Sausage
1 bag Mini Peppers
1 bag (2lbs.) Sweet Vidalia Onions
1 pack PICS Hotdog Buns
1 container Market 32 Deli Salads (Buy one get one FREE)
Shop for Sausage & Peppers here!
Meal 1: Sausage & Peppers
Sausage and Peppers is a versatile meal that can be prepped and cooked in different ways. Check out these hacks and tips!
Essentials:
2 clean cutting boards
1 Chef Knife
BBQ grill skillet or BBQ grill sheet
Pantry:
PICS Olive Oil or PICS Vegetable Oil Spray
Grill the sweet or hot Market 32 Italian Sausage on the grill, and sizzle colorful mini peppers sliced into strips, and sweet Vidalia onions sliced in whole, thin rings in a grill-friendly pan with some PICS Olive Oil (in the seasonal and grilling displays in the store!). The sausage, topped with sizzled peppers and onions, fits perfectly on a PICS Hot Dog Bun, with the fresh Market 32 Deli Pasta Salad rounding out your plate!
Try our these Sausage & Pepper Kabobs!
Essentials:
Good Cook Bamboo Skewers
Simply Done Napkins
Meat thermometer
BBQ corn holders
Measuring cups
TBSP measure
Tongs
Good Cook basting brushes
Pantry:
PICS Vegetable Oil Spray
PICS Sugar
PICS Kosher Salt
Accent seasoning
PICS White Vinegar
PICS Unsalted Butter
Soak skewers in water for 15 minutes while you prep the sausage and veggies. Slice each sausage into 3 pieces. Slice the mini peppers into two halves and the Vidalia onion into chunks. Thread the veggies on the skewers with a pepper half on each side of the chunk of onion and on each side of the piece of sausage. Grill on low, turning to ensure the sausage and vegetables cook through. Serve the kabob in PICS Hot Dog Bun, and remove the skewer, leaving the sausage and vegetables on the bun.
Meal 2: Finger-Licking Good Grilled Chicken Drumsticks, Sweet Corn, and Market 32 Potato Salad
This meal is a breeze and sure to please! Almost no prep and easy clean up – everything cooks on the grill, making it the summer version of a “1-pan” meal.
Hack – Soak corn in 3 cups cool water with a dash of salt and tsp of sugar for about 10 minutes. This helps the kernels stay tender while you grill them up. Brining the chicken legs ensures they are moist and juicy – see the recipe for that here:
Light sodium brine: for 12 – 18 chicken drumsticks.
10 cups water
¼ cup PICS sugar
¼ cup PICS White Vinegar
2 TBSP Accent + 1 TBSP Kosher Salt OR 3 TBSP Kosher Salt
Place brine in a large pot or container. Add the chicken drumsticks, move the pot to the refrigerator and allow to soak for about 20 minutes. When ready to cook, remove from the pot and shake to remove excess brine. Discard the used brine. Place chicken in a foil tray or platter to transport to the grill, and set up a clean platter for the cooked chicken and corn.
A quick spray of PICS Vegetable Oil on the chicken legs and the corn will minimize food sticking to the hot grill.
Cook the chicken over a medium hot fire, turning every few minutes to brown evenly and cook to internal temperature of 165 degrees. The corn and chicken are well-matched for the grill – both will take about 20 minutes to cook. Corn will gradually caramelize, lightly browning. Consider using separate tongs. At the 15 -minute mark, brush on the Sweet Baby Rays Hot Sauce for the adventurous eaters in your family! Turn the chicken legs one more time to caramelize the sauce. Serve with Market 32 Potato Salad, and a pile of Simply Done Napkins!
Family Meals Movement burst
Did you know – more family meals help children learn social skills and support better mental health? A fun conversation starter for May – who has the most flowers in their yard on your street? Did you see any birds or bunnies today?

“The phrase ’working mother’ is redundant.” — Jane Sellman
Being a mother is an exquisitely wonderful and enormously challenging family role. There is a quote on a meme somewhere that frames the unending efforts Moms put into their children’s lives as akin to being an air traffic controller – always working to set the best course for each child, for present and future and every day in between. They organize and plan like the CEOs of major companies but can pivot and reprioritize in the moment when their children need them. We see you, Mom, and we value you for all your efforts to nourish our growth, wellbeing, and success throughout our lives. For all these reasons and more, we want to be sure we can help your family show you how much they value all your efforts with some special meals for this most special day.
Our team worked hard bringing these ideas together, knowing our “value treatment” includes ensuring your family can make these meals taste and look wonderful. Check out the plan and tips that bring it all together and can be done by experienced and not-very experienced cooks. We hope you and your family enjoy these special treats and that your entire Mother’s Day is filled with delicious food, hugs, and smiles. Let’s check out what we have planned for you!
Eggs Benedict:
1 pack Thomas English Muffins
1/2 lb. Market 32 Off the Bone Ham
1 container PICS Hollandaise Sauce
18 pack PICS Eggs
Shop for Eggs Benedict here!
Surf & Turf
1 1/2 lbs. Butcher’s Promise Top Sirloin Steak
1 lb. Market 32 Farm Raised Raw Shrimp
1 package Pero Farms Green Beans
Shop Surf & Turf here!
Meal 1: Eggs Benedict
Starting Mom’s Day in a very special way!
Eggs Benedict is a “big deal” meal for many, a classic brunch beauty that is saved for special days and savored for how it transforms humble ingredients into a culinary celebration. Our step-by-step recipe makes it easy to bring it home without having to bring the chef!
The key to success is preparation: the muffin, ham and extras like fresh fruit are done first, then the sauce, and finally the eggs. We have laid it out here to ensure you can whisk it right to Mom while warm and wonderful!
Essentials:
At least two sturdy, microwave safe coffee mugs (one clean cup per each egg cooked)
1 medium sauté pan (optional if you will sauté the Market32 ham before assembling the egg, muffin and sauce)
1 small saucepan
1 small whisk or a spoon to stir and serve the PICS Hollandaise sauce,
Measuring cups
Slotted spoon (that will fit into the mugs to remove the poached eggs)
Small plate or Simply Done plastic wrap,
Oven safe plate
Simply Done Aluminum Foil
Butter knife
Tablespoon
Pantry:
PICS Vegetable Oil Spray
Butter (room temperature for easy spreading)
Ready…..
Preheat oven to the lowest setting, “Warm” or 200 degrees F.
Make the coffee or set up the mimosa bar. Set up the number of serving plates needed for your family near the stove or cooking area. If you are serving fresh fruit with the Eggs Benedict, portion that out on the plates.
Split the English Muffins and set them by the toaster. Each person should have both halves of the muffin as the base and will have a poached egg on each one. Smaller children may only need one half.
Place eggs by the microwave, with the mugs. Measure ½ -3/4 cup of water and place in each mug.
Set…..
Place Market 32 Off the Bone ham slices on a plate. Cut each slice in half – this ensures you can fit the ham on the muffin and its a flat surface that will keep the egg in place. Optional prep: Spray the sauté pan with PICS Vegetable Spray, set on low heat on a burner. Briefly brown the ham slices to warm and add flavor. You can hold the ham and toasted, buttered muffins on the oven-safe plate in the oven while cooking the other ingredients.
Start toasting the English muffins. Older children can help and can butter them when ready. Place the toasted, buttered muffins next to the ham on the plate in the oven. Cover the plate lightly with foil. They can also set up the mugs with the ¾ cup of water near the microwave. Younger children can put napkins on the table. Move the plates for the finished muffins to the other side of the microwave.
Go! Crunch time! You cook the sauce and poach the eggs at the same time. Mom should be at the table, (perhaps escorted there by your helpers) with her beverage, enjoying the show (and the knowledge that she isn’t cleaning up either. 😊)
Hollandaise sauce – follow directions on the package for the PICS Hollandaise Sauce, whisking in the small saucepan. When it is almost done, take the plate with warm ham and muffins out, and set near the stove so you can poach eggs and assemble the Eggs Benedict quickly and easily.
Microwave poached eggs – super easy, and easy clean up!
These steps are quick – have each plate ready with the warm muffin and ham set up and ready to place each poached egg and two tablespoons of sauce.
Place one microwave-safe coffee mug with water in the microwave. Microwave the mug/water on high for 45 seconds. Water should be steaming but not boiling. Crack the egg into the hot water. Place a small clean plate on the mug (or cover with cling wrap). Return to the microwave and cook for 45 seconds. Due to the different levels of power in microwaves, plan on experimenting with the first egg. SAFETY TIP – sometimes eggs explode when the plate or wrap are removed – keep your face away from the top of the cup during this step for each egg. Children may want to “see”; consider having them already at the table, or waiting at the kitchen door to ensure you can prep and finish safely. Check the egg for desired doneness – whites should be completely cooked, and the yolk should be tender and gooey. If it is not quite ready, return the mug to the microwave for 10 seconds, and/or leave the plate on the cup for 10 more seconds. Use the slotted spoon to lift the eggs out and drain the water at the same time. Place the poached egg on the ham, and top with warm Hollandaise. So special! Enjoy!
Meal 2: Surf & Turf
Surf and Turf – a great way to end a special day!
This fantastic dinner is simple but delivers all the special you want to put into Mom’s day. The top sirloin steak on sale can be subbed for the ribeye in this recipe, with a couple of tips to ensure it is tender and awesome! Marinate with Italian dressing, and broil to seal in the juices and tenderness. Slice it thin and consider topping with some garlic butter for an unctuous extra touch. Prepare the fresh green beans in a shallow, wide saucepan – steam or boil until they are tender, and top with butter for a wonderful side. The parmesan Market 32 shrimp are the crowning glory for this amazing entrée!
Check out our Ribeye Steak with Parmesean Shrimp!
Extra! Extra!
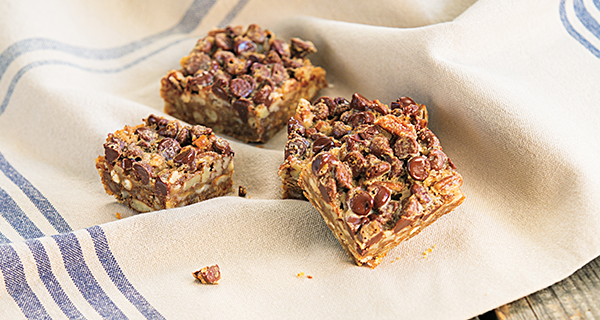
Dressed up Dessert – Market 32 Cheesecake slices with berries/sliced fresh fruit, or the Market 32 Fresh Chocolate Dipped fruit are both winners for a great family meal honoring that most important guest. Check out our cheesecakes here!
Happy Mother’s Day!
And just like that – it’s spring!
The Northeast is a great place to live, especially for the variety changing seasons brings to our landscape and our tables! Last weekend I had snow in my gardens and flowers popping up through it with their bright and hopeful colors. A few days later, and the temperatures are rising, my neighbors are out walking, and families are getting busy with spring sports and clubs. Those busy days call for quick meals that make everyone happy and keep budgets on track.
This week, Shady Brook Turkey Sausage is the star – affordable, versatile, and available in sweet or hot flavor profiles. Our recipes are so easy and appetizing, you may even plan to double up on the sales and have these meals again in the next couple of weeks!
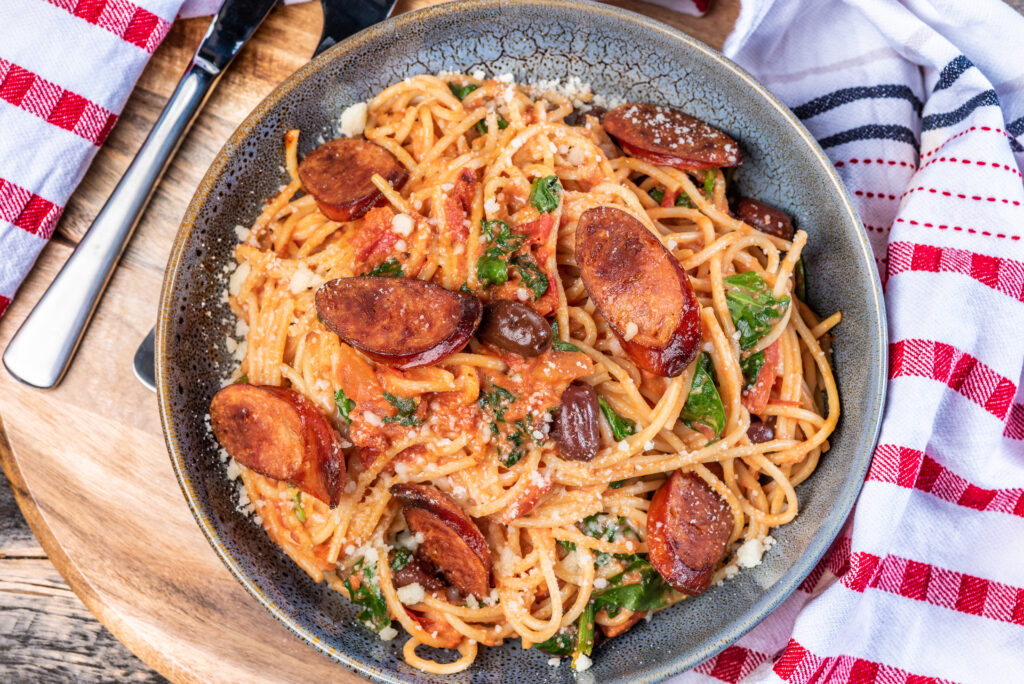
Savory Turkey Sausage & Pasta Dinner
1 pack Shady Brook Farms Italian Turkey Sausage
1 box PICS Spaghetti
1 loaf PICS Italian Bread
1 lb. Broccoli Crowns
1 jar (24oz) PICS Pasta Sauce
Shop Savory Turkey Sausage & Pasta Dinner here!
Sweet or Spicy Red Beans & Turkey Sausage Bowl
1 pack Shady Brook Farms Italian Turkey Sausage
3 cans (15.5oz) PICS Kidney Beans
1 Green Bell Pepper
1 Vidalia Onion
Shop Sweet or Spicy Red Beans & Turkey Sausage Bowl here!
Meal 1: Savory Turkey Sausage & Pasta Dinner
Meal prep just became a lot easier with this recipe! Check out this turkey & pasta dinner for a new meal idea in the household.
Essentials:
1 large microwavable plate
1 large saucepans(or 1 each of a large skillet and saucepan)
1 small saucepan
A can opener
Tongs
Colander
Spatula
Serrated knife
Cutting board
Aimply Done Aluminum Foil
Pantry:
PICS Vegetable Oil Spray
15 OZ. can PICS Petite Italian Diced Tomatoes
PICS Unsalted Butter
Garlic powder
Preheat oven to 200 degrees fahrenheit.
Thoroughly rinse the broccoli and set on a clean towel to dry. Hack– no need to cut it up before cooking! Place the whole broccoli, crown down, in a large saucepan or high-sided skillet. Add water to cover the crowns and the lower part of the stalks. You will steam them up just before plating the meal!
Slice the Italian Bread in half lengthwise, and lightly butter both sides of the bread. Sprinkle garlic powder on the butter. Close the loaf and wrap in foil. Place the bread on the upper rack in the oven – the low temp will warm it and melt the butter without burning. You may turn it down to the “Warm” setting after 10 minutes or so.
Fill 1 large saucepan with water, and a pinch of salt if you like, for the PICS pasta. Place it on a back burner on high heat. Follow package directions for cooking the pasta. Drain in the colander when done.
While the pasta water is heating, open the jar of PICS Pasta Sauce and pour it into a large saucepan. Use a spatula to get all the sauce out, or, add a splash of water to the jar and swirl it around, then add to the saucepan to minimize waste. Open the can of PICS Diced Tomatoes and add to the pasta sauce. Turn the burner heat on to medium and stir often as it heats up – when it is gently simmering, turn the heat down to low and stir frequently.
Cooking and slicing turkey sausage – two options:
Turkey sausage is very tender, so cooking at least partially helps you cut it into uniform pieces. Cutting into similar size pieces helps the whole meal cook evenly and completely.
Hack – Place the sausage on the large microwavable plate. Place the plate into the microwave and microwave for two minutes; use the tongs to turn the sausage, and microwave for two to three minutes more. If you prefer, use a large skillet to brown the sausage first.
Then, slice into rounds, using tongs or a fork to keep them steady as they will be hot and add the sausage to the pasta sauce.
When you are about 10 minutes from serving the meal, turn a different burner on high and boil/steam the broccoli crowns for 3 – 5 minutes, until fork tender. Remove them from the pan with tongs and quickly cut the florets off into smaller pieces right on the serving plate!
Divide the pasta on four plates next to the broccoli, and ladle on the turkey sauce and pasta sauce. A sprinkle of parmesan cheese and you are ready!
Meal 2: Sweet or Spicy Red Beans & Turkey Sausage Bowl
The dish can be sweet or savory, depending on which flavor turkey sausage is used. If you prefer sweet, eliminate the hot sauce. Tip – If Cajun seasoning is not on your list, try curry! Add ½ tsp of spice at a time until you’re happy with the seasoning.
Essentials:
Large, deep skillet or pot
Can opener
Colander
Wooden spoon
Chef’s knife
Cutting board
Liquid measuring cup
Pantry:
PICS Olive Oil
Three 15 OZ. cans PICS Red Beans, rinsed and drained
2 cloves of garlic (or 2 TBSP minced garlic)
1.5 Tsp Cajun Seasoning
Dash hot pepper sauce
Optional:
Hot cooked PICS rice or quinoa, cooked according to package instructions.
Wash green pepper and allow to dry on a clean towel.
Chop 1 medium onion and dice the green pepper. Mince garlic cloves.
Add 1-2 TBSP olive oil to the skillet, heating until oil is warm and shimmering. Add the chopped vegetables, sautéing until tender. Add the minced garlic, and stir, cooking for one additional minute. Remove the vegetables to a bowl.
Add 1 TBSP olive oil to the skillet, and add the Turkey Sausage, using tongs to turn them occasionally. Cook on medium until brown and done. Remove to a plate or cutting board, and slice into rounds.
Add vegetables, red beans, Cajun seasoning, and hot sauce, and 1 cup of water to the skillet. Allow liquid in the pan to come to a simmer, and add the sliced sausage, stirring and combining all ingredients together in the skillet.
Place a serving of rice in each of four bowls and spoon the Red Beans and Sausage on the rice.
Enjoy!
Adapted from Taste of Home, accessed 4/8/2024. Red Beans and Sausage Recipe: How to Make It (tasteofhome.com)