Mia Teal

Marketing Coordinator, Paid Media

We are celebrating mangoes all July long, and today, July 22nd, we’re kicking it up a notch for National Mango Day! We’re so excited to share our passion for this versatile fruit with you. From enjoying mangoes in their natural state to crafting smoothies or baking sweet treats, we’ll teach you how to select the best mangoes, cut them properly, and more!

How to Choose a Mango:

Unlike other fruits, color is not always the best indicator of a mango’s ripeness. Believe it or not, mangoes come in a variety of shapes and colors. In order to discover if a mango is ready to eat, give it a gentle squeeze. An unripe mango will be firm, whereas a ripe mango will be a little soft. 

However, mangoes can be enjoyed at all different stages of life depending on preference. The flavors vary from sour-tart to sweet.

How to Cut a Mango:

Step 1: Choose your mango, of course!

Step 2: Rinse off the mango.

Step 3: Place the mango on a cutting board with the stem end facing up.

Step 4: Cut down along the flat sides of the mango, starting just off-center to avoid the large seed in the middle.

Step 5: Slice from top to bottom on both sides of the seed.

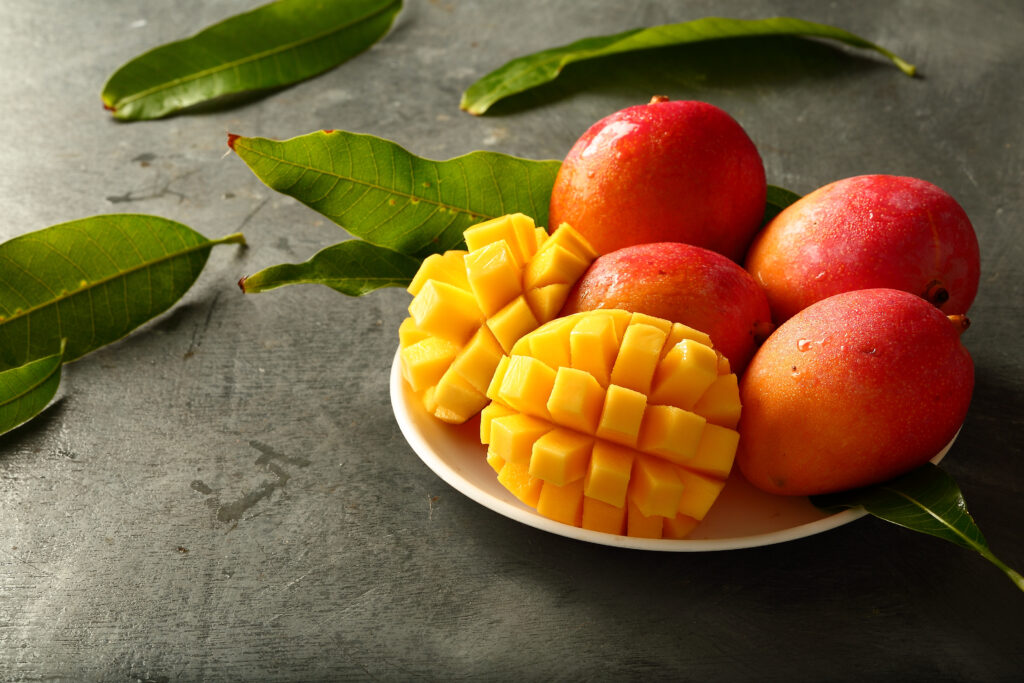
Step 6: Using a knife, make vertical and horizontal cuts in the flesh, creating a grid pattern. Be careful not to cut through the skin.

Step 7: Use a knife or a spoon to remove the mango from the skin.

Step 8: ENJOY!

Mango Recipes:

Facebook
Twitter
Pinterest

Source:

Mango.org

Picture this: tender slices of grilled steak nestled between two slices of toasted artisan bread, perhaps with a smear of garlic aioli or a tangy steak sauce. Sounds incredible, right? Now picture a fun fiesta of a fresh bed of lettuce, ground turkey, beans, & corn. Sounds amazing, right?

What if we told you these Steak Sandwiches & Taco Salads only have five ingredients? Easy and delicious! Let’s check out this week’s items to make these recipes…

Taco Salads:

1 package Ground Turkey (Buy one get one FREE!)

1 can (16oz) PICS Black Beans

1 can (16 oz PICS Canned Corn)

1 package PICS Taco Seasoning 

Shop for Taco Salads here!

Steak Sandwiches:

1 package Certified Angus Beef Steak (Buy one get one FREE)

1 package RealSweet Vidalia Onions

1 container Market 32 Whole White Mushrooms

1 bottle PICS Marinade

1 pack Market 32 Rolls (found in bakery section)

Shop for Steak Sandwiches here!

Check out this fun twist on your steak sandwich!
Facebook
Twitter
Pinterest

Summer is the perfect time to fire up the grill, gather with friends and family, and indulge in delicious, hearty meals. This week, we are bringing you a traditional burger recipe, along with a nacho appetizer and meatball sub for lunch. Better yet, Market 32 80% Ground Beef Mega Pack is on sale this week only!

Let’s see what ingredients we have on the menu…

Burgers & Beans!

1 lb. Ground Beef

1 pack PICS Hamburger Buns

4 ears Corn

1 can (16oz) PICS Baked Beans

Shop for Burgers & Baked Beans here!

Hearty Meatball Subs!

1 lb. Ground Beef

1 pack Market 32 Hoagie Rolls

1 jar Ragu Pasta Sauce

1 bag (8oz) PICS Mozzarella Cheese

Shop for Meatball Subs here!

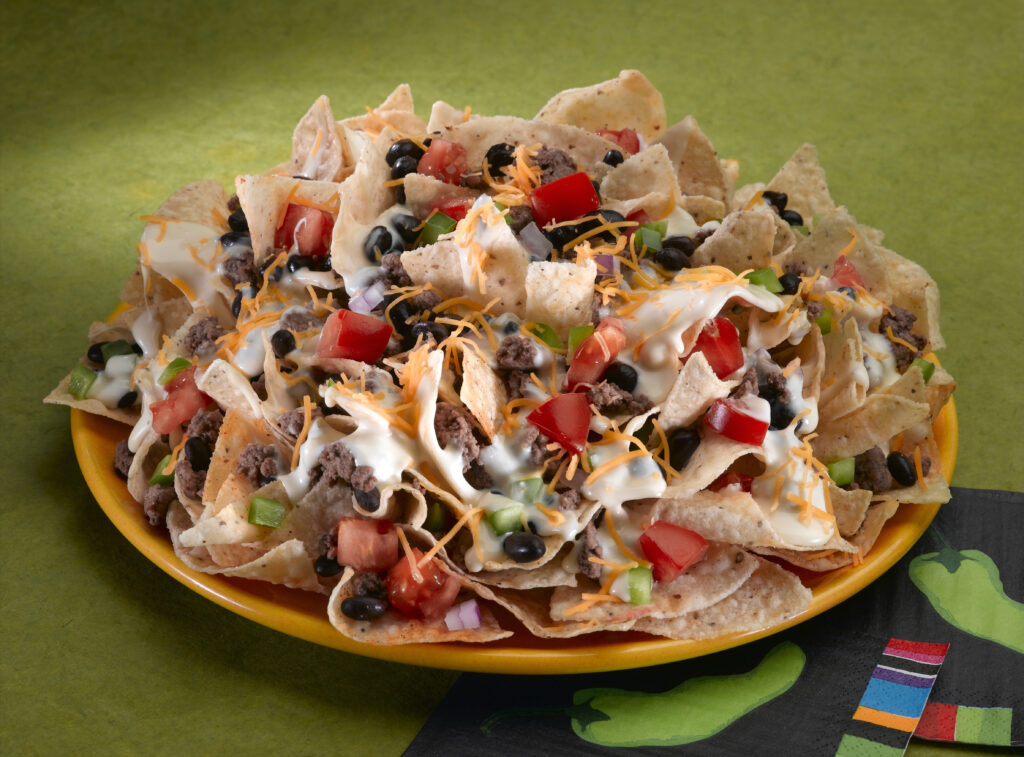
It’s Nacho Time!

1 lb. Ground Beef

1 bag (8oz) PICS Mozzarella Cheese

1 bag On the Border Tortilla Chips

1 jar (16oz) PICS Salsa

1 can (16oz) PICS Canned Black Beans

Shop for Nachos here!
Facebook
Twitter
Pinterest

Grilling days are on the menu! We have some ideas you and your family will love, while you are loving eating more meals with your family. Warmer days also mean grilling outside can keep inside cool and comfortable.

Let’s check out this week’s meal planning items.

Sausage & Peppers:

1 pack Market 32 Sweet or Hot Italian Sausage

1 bag Mini Peppers

1 bag (2lbs.) Sweet Vidalia Onions

1 pack PICS Hotdog Buns

1 container Market 32 Deli Salads (Buy one get one FREE)

Shop for Sausage & Peppers here!

Chicken Drumsticks:

4 lbs. Market 32 Chicken Drumsticks

4 ears of sweet corn (10/$2 with an eCoupon)

1 bottle Sweet Baby Ray’s Hot Sauce

1 container Market 32 Deli Salads (Buy one get one FREE)

Shop for Chicken Drumsticks here!

Meal 1: Sausage & Peppers

Sausage and Peppers is a versatile meal that can be prepped and cooked in different ways. Check out these hacks and tips!

Essentials:

2 clean cutting boards

1 Chef Knife

BBQ grill skillet or BBQ grill sheet 

Pantry:

PICS Olive Oil or PICS Vegetable Oil Spray

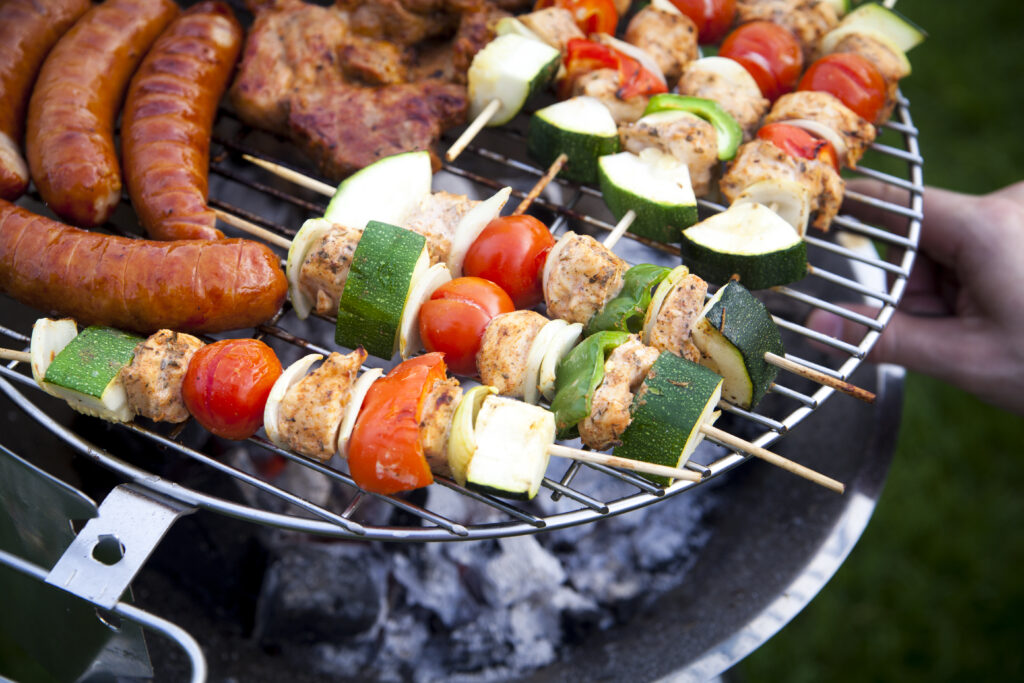
Grill the sweet or hot Market 32 Italian Sausage on the grill, and sizzle colorful mini peppers sliced into strips, and sweet Vidalia onions sliced in whole, thin rings in a grill-friendly pan with some PICS Olive Oil (in the seasonal and grilling displays in the store!). The sausage, topped with sizzled peppers and onions, fits perfectly on a PICS Hot Dog Bun, with the fresh Market 32 Deli Pasta Salad rounding out your plate!

Try our these Sausage & Pepper Kabobs!

Essentials:

Good Cook Bamboo Skewers

Simply Done Napkins

Meat thermometer

BBQ corn holders

Measuring cups

TBSP measure

Tongs

Good Cook basting brushes 

Pantry:

PICS Vegetable Oil Spray

PICS Sugar

PICS Kosher Salt

Accent seasoning

PICS White Vinegar

PICS Unsalted Butter

Soak skewers in water for 15 minutes while you prep the sausage and veggies. Slice each sausage into 3 pieces. Slice the mini peppers into two halves and the Vidalia onion into chunks. Thread the veggies on the skewers with a pepper half on each side of the chunk of onion and on each side of the piece of sausage. Grill on low, turning to ensure the sausage and vegetables cook through. Serve the kabob in PICS Hot Dog Bun, and remove the skewer, leaving the sausage and vegetables on the bun.

Meal 2: Finger-Licking Good Grilled Chicken Drumsticks, Sweet Corn, and Market 32 Potato Salad

This meal is a breeze and sure to please! Almost no prep and easy clean up – everything cooks on the grill, making it the summer version of a “1-pan” meal.

Hack – Soak corn in 3 cups cool water with a dash of salt and tsp of sugar for about 10 minutes. This helps the kernels stay tender while you grill them up. Brining the chicken legs ensures they are moist and juicy – see the recipe for that here:

Light sodium brine: for 12 – 18 chicken drumsticks.

10 cups water

¼ cup PICS sugar

¼ cup PICS White Vinegar

2 TBSP Accent + 1 TBSP Kosher Salt OR 3 TBSP Kosher Salt

Place brine in a large pot or container. Add the chicken drumsticks, move the pot to the refrigerator and allow to soak for about 20 minutes. When ready to cook, remove from the pot and shake to remove excess brine. Discard the used brine. Place chicken in a foil tray or platter to transport to the grill, and set up a clean platter for the cooked chicken and corn.

A quick spray of PICS Vegetable Oil on the chicken legs and the corn will minimize food sticking to the hot grill.

Cook the chicken over a medium hot fire, turning every few minutes to brown evenly and cook to internal temperature of 165 degrees. The corn and chicken are well-matched for the grill – both will take about 20 minutes to cook. Corn will gradually caramelize, lightly browning. Consider using separate tongs. At the 15 -minute mark, brush on the Sweet Baby Rays Hot Sauce for the adventurous eaters in your family! Turn the chicken legs one more time to caramelize the sauce. Serve with Market 32 Potato Salad, and a pile of Simply Done Napkins!

Family Meals Movement burst

Did you know – more family meals help children learn social skills and support better mental health? A fun conversation starter for May – who has the most flowers in their yard on your street? Did you see any birds or bunnies today?

Facebook
Twitter
Pinterest

“The phrase ’working mother’ is redundant.” — Jane Sellman

Being a mother is an exquisitely wonderful and enormously challenging family role. There is a quote on a meme somewhere that frames the unending efforts Moms put into their children’s lives as akin to being an air traffic controller – always working to set the best course for each child, for present and future and every day in between. They organize and plan like the CEOs of major companies but can pivot and reprioritize in the moment when their children need them. We see you, Mom, and we value you for all your efforts to nourish our growth, wellbeing, and success throughout our lives. For all these reasons and more, we want to be sure we can help your family show you how much they value all your efforts with some special meals for this most special day.

Our team worked hard bringing these ideas together, knowing our “value treatment” includes ensuring your family can make these meals taste and look wonderful. Check out the plan and tips that bring it all together and can be done by experienced and not-very experienced cooks. We hope you and your family enjoy these special treats and that your entire Mother’s Day is filled with delicious food, hugs, and smiles. Let’s check out what we have planned for you!

Eggs Benedict:

1 pack Thomas English Muffins

1/2 lb. Market 32 Off the Bone Ham

1 container PICS Hollandaise Sauce

18 pack PICS Eggs

Shop for Eggs Benedict here!

Surf & Turf

1 1/2 lbs. Butcher’s Promise Top Sirloin Steak

1 lb. Market 32 Farm Raised Raw Shrimp

1 package Pero Farms Green Beans

Shop Surf & Turf here!

Meal 1: Eggs Benedict

Starting Mom’s Day in a very special way!

Eggs Benedict is a “big deal” meal for many, a classic brunch beauty that is saved for special days and savored for how it transforms humble ingredients into a culinary celebration. Our step-by-step recipe makes it easy to bring it home without having to bring the chef!

The key to success is preparation: the muffin, ham and extras like fresh fruit are done first, then the sauce, and finally the eggs. We have laid it out here to ensure you can whisk it right to Mom while warm and wonderful!

Essentials:

At least two sturdy, microwave safe coffee mugs (one clean cup per each egg cooked)

1 medium sauté pan (optional if you will sauté the Market32 ham before assembling the egg, muffin and sauce)

1 small saucepan

1 small whisk or a spoon to stir and serve the PICS Hollandaise sauce,

Measuring cups

Slotted spoon (that will fit into the mugs to remove the poached eggs)

Small plate or Simply Done plastic wrap,

Oven safe plate

Simply Done Aluminum Foil

Butter knife

Tablespoon

Pantry:

PICS Vegetable Oil Spray

Butter (room temperature for easy spreading)

Ready…..

Preheat oven to the lowest setting, “Warm” or 200 degrees F.

Make the coffee or set up the mimosa bar. Set up the number of serving plates needed for your family near the stove or cooking area. If you are serving fresh fruit with the Eggs Benedict, portion that out on the plates.

Split the English Muffins and set them by the toaster. Each person should have both halves of the muffin as the base and will have a poached egg on each one. Smaller children may only need one half.

Place eggs by the microwave, with the mugs. Measure ½ -3/4 cup of water and place in each mug.

Set…..

Place Market 32 Off the Bone ham slices on a plate. Cut each slice in half – this ensures you can fit the ham on the muffin and its a flat surface that will keep the egg in place. Optional prep:  Spray the sauté pan with PICS Vegetable Spray, set on low heat on a burner. Briefly brown the ham slices to warm and add flavor. You can hold the ham and toasted, buttered muffins on the oven-safe plate in the oven while cooking the other ingredients.

Start toasting the English muffins. Older children can help and can butter them when ready. Place the toasted, buttered muffins next to the ham on the plate in the oven. Cover the plate lightly with foil. They can also set up the mugs with the ¾ cup of water near the microwave. Younger children can put napkins on the table. Move the plates for the finished muffins to the other side of the microwave.

Go! Crunch time! You cook the sauce and poach the eggs at the same time. Mom should be at the table, (perhaps escorted there by your helpers) with her beverage, enjoying the show (and the knowledge that she isn’t cleaning up either. 😊)

Hollandaise sauce – follow directions on the package for the PICS Hollandaise Sauce, whisking in the small saucepan. When it is almost done, take the plate with warm ham and muffins out, and set near the stove so you can poach eggs and assemble the Eggs Benedict quickly and easily.

Microwave poached eggs – super easy, and easy clean up!

These steps are quick – have each plate ready with the warm muffin and ham set up and ready to place each poached egg and two tablespoons of sauce.

Place one microwave-safe coffee mug with water in the microwave. Microwave the mug/water on high for 45 seconds. Water should be steaming but not boiling. Crack the egg into the hot water. Place a small clean plate on the mug (or cover with cling wrap). Return to the microwave and cook for 45 seconds. Due to the different levels of power in microwaves, plan on experimenting with the first egg. SAFETY TIP – sometimes eggs explode when the plate or wrap are removed – keep your face away from the top of the cup during this step for each egg. Children may want to “see”; consider having them already at the table, or waiting at the kitchen door to ensure you can prep and finish safely. Check the egg for desired doneness – whites should be completely cooked, and the yolk should be tender and gooey. If it is not quite ready, return the mug to the microwave for 10 seconds, and/or leave the plate on the cup for 10 more seconds. Use the slotted spoon to lift the eggs out and drain the water at the same time. Place the poached egg on the ham, and top with warm Hollandaise. So special! Enjoy!

Meal 2: Surf & Turf

Surf and Turf – a great way to end a special day!

This fantastic dinner is simple but delivers all the special you want to put into Mom’s day. The top sirloin steak on sale can be subbed for the ribeye in this recipe, with a couple of tips to ensure it is tender and awesome! Marinate with Italian dressing, and broil to seal in the juices and tenderness. Slice it thin and consider topping with some garlic butter for an unctuous extra touch. Prepare the fresh green beans in a shallow, wide saucepan – steam or boil until they are tender, and top with butter for a wonderful side. The parmesan Market 32 shrimp are the crowning glory for this amazing entrée!

Check out our Ribeye Steak with Parmesean Shrimp!

Extra! Extra!

Dressed up Dessert – Market 32 Cheesecake slices with berries/sliced fresh fruit, or the Market 32 Fresh Chocolate Dipped fruit are both winners for a great family meal honoring that most important guest. Check out our cheesecakes here!

Happy Mother’s Day!  

Facebook
Twitter
Pinterest

And just like that – it’s spring!

The Northeast is a great place to live, especially for the variety changing seasons brings to our landscape and our tables! Last weekend I had snow in my gardens and flowers popping up through it with their bright and hopeful colors. A few days later, and the temperatures are rising, my neighbors are out walking, and families are getting busy with spring sports and clubs. Those busy days call for quick meals that make everyone happy and keep budgets on track.  

This week, Shady Brook Turkey Sausage is the star – affordable, versatile, and available in sweet or hot flavor profiles. Our recipes are so easy and appetizing, you may even plan to double up on the sales and have these meals again in the next couple of weeks!

Savory Turkey Sausage & Pasta Dinner

1 pack Shady Brook Farms Italian Turkey Sausage

1 box PICS Spaghetti

1 loaf PICS Italian Bread

1 lb. Broccoli Crowns

1 jar (24oz) PICS Pasta Sauce

Shop Savory Turkey Sausage & Pasta Dinner here!

Sweet or Spicy Red Beans & Turkey Sausage Bowl

1 pack Shady Brook Farms Italian Turkey Sausage

3 cans (15.5oz) PICS Kidney Beans

1 Green Bell Pepper

1 Vidalia Onion

Shop Sweet or Spicy Red Beans & Turkey Sausage Bowl here!

Meal 1: Savory Turkey Sausage & Pasta Dinner

Meal prep just became a lot easier with this recipe! Check out this turkey & pasta dinner for a new meal idea in the household.

Essentials:

1 large microwavable plate

1 large saucepans(or 1 each of a large skillet and saucepan)

1 small saucepan

A can opener

Tongs

Colander

Spatula

Serrated knife

Cutting board

Aimply Done Aluminum Foil

Pantry:

PICS Vegetable Oil Spray

15 OZ. can PICS Petite Italian Diced Tomatoes

PICS Unsalted Butter

Garlic powder

Preheat oven to 200 degrees fahrenheit.

Thoroughly rinse the broccoli and set on a clean towel to dry. Hack– no need to cut it up before cooking! Place the whole broccoli, crown down, in a large saucepan or high-sided skillet. Add water to cover the crowns and the lower part of the stalks. You will steam them up just before plating the meal!

Slice the Italian Bread in half lengthwise, and lightly butter both sides of the bread. Sprinkle garlic powder on the butter. Close the loaf and wrap in foil. Place the bread on the upper rack in the oven – the low temp will warm it and melt the butter without burning. You may turn it down to the “Warm” setting after 10 minutes or so.

Fill 1 large saucepan with water, and a pinch of salt if you like, for the PICS pasta. Place it on a back burner on high heat. Follow package directions for cooking the pasta. Drain in the colander when done.  

While the pasta water is heating, open the jar of PICS Pasta Sauce and pour it into a large saucepan. Use a spatula to get all the sauce out, or, add a splash of water to the jar and swirl it around, then add to the saucepan to minimize waste. Open the can of PICS Diced Tomatoes and add to the pasta sauce. Turn the burner heat on to medium and stir often as it heats up – when it is gently simmering, turn the heat down to low and stir frequently.

Cooking and slicing turkey sausage – two options:

Turkey sausage is very tender, so cooking at least partially helps you cut it into uniform pieces. Cutting into similar size pieces helps the whole meal cook evenly and completely.

Hack – Place the sausage on the large microwavable plate. Place the plate into the microwave and microwave for two minutes; use the tongs to turn the sausage, and microwave for two to three minutes more. If you prefer, use a large skillet to brown the sausage first.

Then, slice into rounds, using tongs or a fork to keep them steady as they will be hot and add the sausage to the pasta sauce.

When you are about 10 minutes from serving the meal, turn a different burner on high and boil/steam the broccoli crowns for 3 – 5 minutes, until fork tender. Remove them from the pan with tongs and quickly cut the florets off into smaller pieces right on the serving plate!

Divide the pasta on four plates next to the broccoli, and ladle on the turkey sauce and pasta sauce. A sprinkle of parmesan cheese and you are ready!

Meal 2: Sweet or Spicy Red Beans & Turkey Sausage Bowl

The dish can be sweet or savory, depending on which flavor turkey sausage is used. If you prefer sweet, eliminate the hot sauce. Tip – If Cajun seasoning is not on your list, try curry! Add ½ tsp of spice at a time until you’re happy with the seasoning.

Essentials:

Large, deep skillet or pot

Can opener

Colander

Wooden spoon

Chef’s knife

Cutting board

Liquid measuring cup

Pantry:

PICS Olive Oil

Three 15 OZ. cans PICS Red Beans, rinsed and drained

2 cloves of garlic (or 2 TBSP minced garlic)

1.5 Tsp Cajun Seasoning

Dash hot pepper sauce

Optional:

Hot cooked PICS rice or quinoa, cooked according to package instructions.

Wash green pepper and allow to dry on a clean towel.

Chop 1 medium onion and dice the green pepper. Mince garlic cloves.

Add 1-2 TBSP olive oil to the skillet, heating until oil is warm and shimmering. Add the chopped vegetables, sautéing until tender. Add the minced garlic, and stir, cooking for one additional minute. Remove the vegetables to a bowl.

Add 1 TBSP olive oil to the skillet, and add the Turkey Sausage, using tongs to turn them occasionally. Cook on medium until brown and done. Remove to a plate or cutting board, and slice into rounds.

Add vegetables, red beans, Cajun seasoning, and hot sauce, and 1 cup of water to the skillet. Allow liquid in the pan to come to a simmer, and add the sliced sausage, stirring and combining all ingredients together in the skillet.

Place a serving of rice in each of four bowls and spoon the Red Beans and Sausage on the rice.

Enjoy!

Adapted from Taste of Home, accessed 4/8/2024. Red Beans and Sausage Recipe: How to Make It (tasteofhome.com)

Facebook
Twitter
Pinterest

Welcome to the sizzling world of pork! Whether you’re a dedicated carnivore or simply on the hunt for a new culinary adventure, pork offers a delicious array of possibilities that can tantalize taste buds and satisfy cravings.

We are changing up this week’s Value Meals, and bringing you two incredible pork recipes we think you’ll love. Let’s check out this week’s ingredients:

Sheet Pan Pork Chops

Bone-in pork chop savings pack (4 chops)

5 medium yellow potatoes

1 lb. Fresh Asparagus

Shop here for Sheet Pan Pork Chops!

Pulled Pork (Chops) & Cole Slaw

Bone-in pork chops savings pack (4 chops)

1 kit – Dole Cole Slaw

1 package PICS Hamburger Buns

1 Medium Onion, peeled & chopped

Shop here for Pulled Pork (Chops) & Cole Slaw!

Meal 1: Sheet Pan Pork Chops

Essentials:

Sheet pan

Simply Done Aluminum Foil

Cutting board

Chef knife

Large microwavable bowl

From the Pantry:

¾ cup PICS Crumbled Feta or Shredded Parmesan

Garlic Powder

Salt & Pepper,

PICS Vegetable Oil Spray

PICS Extra Virgin Olive Oil

This sheet pan dinner is flexible and flavorful! The key to great sheet pan meals is making sure you know the cooking times for each food, so you can adjust preparation and timing as needed to finish cooking at the same time. We share some hacks and tips here to help you create a delicious meal and get the best value from each ingredient.

Preheat the oven to 400 degrees fahrenheit.

Wash and dry the potatoes, and wash the asparagus, setting them aside on a clean towel to dry.

Dice the potatoes (skins on for extra flavor, texture and fiber!), and place in the microwavable bowl. Toss the potatoes with 1 Tbsp PICS Olive Oil, and 1 tsp of garlic powder, salt and pepper to taste. Microwave on high for 3 – 5 minutes.

(#Hack – “pre-cooking the potatoes ensures they will be done when the rest of the meal is finished, and reduces risk of overcooking the chops and asparagus.)

Line the sheet pan with the foil, and spray the foil with the PICS Vegetable Oil Spray.

Place the 4 chops side-by-side in the center of the pan, leaving some space between each, and leaving two large spaces at each end of the sheet pan.

Remove the potatoes from the microwave and add them to one end of the sheet pan, spreading them out so they cook evenly.

Place the sheet pan in the oven on the top rack, and set the timer for 15 minutes.

Move the asparagus to the cutting board, and cut off the woody ends. You may leave them whole, or cut them into thirds. Place the cut vegetable in a bowl and toss with a tsp of PICS Olive Oil. Place the vegetables and cheese near the stove, and keep the meat thermometer handy.

When the timer is up, remove the sheet pan and place on the stove top. Sprinkle the cheese on the pork chops and asparagus. Return the pan to the oven and set the timer for 8 minutes.

When the timer is up, check the pan – the cheese should be melted and bubbling. Remove the sheet pan and check one of the chops – the temperature should be about 145 degrees. Allow the pan to rest on the stove top, and serve up the potatoes and vegetables, moving the chops last to allow for a few minutes rest.

Enjoy!

Meal 2: Pulled Pork (Chops) & Cole Slaw

Essentials:

1 large slow cooker

Chef knife

Cutting board

From the Pantry:

Kosher salt

Pepper

Onion powder

Optional apple or mandarin orange segments

This flexible recipe is a wonderful, hands-off, one-pot dinner you can start in the early afternoon and finish up in just a few minutes. The light base seasoning is good enough to enjoy as is, or easy to combine with other spices, BBQ sauce, Thai Peanut Sauce, or whatever you like! There won’t be any leftovers!

Combine 1 TBSP each of onion powder, Kosher salt and pepper. Place the first pork chop in the slow cooker and sprinkle the seasoning generously; repeat for each chop.  Add the chopped onion to the cooker, on top of and around the chops. Cover and set for 4 hours on low.

An hour before the pork is finished, follow package directions and prepare the coleslaw. Make a great plate – stretch out the slaw, adding flavor and nutrients, by adding some fruit. Peel and chop the apple or mandarin orange (canned, drained mandarins can also be used). Add them into the coleslaw for a fun flavor twist.

When the pork is done, check for temperature – it should be 145 degrees or higher, and fall-apart tender. Use two large forks to shred the pork, allowing the meat to fall into the juices and melted onion, stirring to combine. Use tongs to remove the bones. Toast the buns if you like. Serve it all up and enjoy a great value family meal!

Enjoy!

Facebook
Twitter
Pinterest

These meals are crowd-pleasers, timesavers, and budget buddies – we bet there won’t be any leftovers either! Market 32 Meatball/Meatloaf Mix is freshly seasoned so you have a delicious base to build with. Let’s check out this week’s ingredients, shall we?

Meatball Slider Bake

1 lb. Market 32 Meatball/Meatloaf Mix

1/2 lb. Market 32 Deli Sliced Provolone

1 jar (24oz.) PICS Marinara Sauce

1 Yellow Onion

1 Seedless Cucumber

1 package Bakery Brioche Buns

Shop for Meatball Slider Bake here!

Meatloaf

1 1/2 lbs. Market 32 Meatball/Meatloaf Mix

1 1/2 lbs. Sweet Potatoes

1 pouch PICS Beef Gravy

1 bag Pero Farms Green Beans

Shop for Meatloaf here!

Meal 1: Easy, Cheesy Meatball Slider Bake and Cucumber Salad

A crisp, bright side salad brings crunch and zest to complement the savory, cheesy sliders. YES!

Essentials: 2 cutting boards, large, serrated knife, sheet pan, Simply Done Aluminum Foil, 2 Simply Done gallon storage bags, large bowl for salad, paring knife, vegetable peeler (optional) liquid measuring cup, meat thermometer

From the Pantry – 3 TBSP PICS Unsalted butter, melted; PICS White Vinegar, PICS Sugar, Italian Spice Blend

Food Safety notes: Wash hands before and after handling raw and cooked meat. Wash cucumber before slicing. Use separate cutting boards and knives for each food group.

Directions:

– Preheat oven to 350 degrees.

-Place 2 sheet pans on the counter, and cover with aluminum foil. Spray aluminum foil with PICS Vegetable Oil. Count the number of rolls in the package of rolls you are using, and plan to make the same number of meatballs. For this recipe, we will use 12 as the number of rolls and servings.

-Place 1 cutting board on the counter, and transfer meat from the package to the board. Flatten the meat slightly, and lightly score with a butter knife in a cross-section pattern to get to the # of sliders/servings you need.

  • For example, scoring 3 lines from left to right, and 4 from top to bottom should yield 12 even-ish portions that can be cut and rolled into meatballs. (Hack/optional – Use the 2 storage bags as “gloves” to make meatballs, (you can secure with a rubber band or chip clip) rolling them to your preferred size, and flattening slightly as you place them on one of the sheet pans. Put the meatballs in the oven to cook for about 20 minutes, or until an instant read thermometer says 145 degrees. Remove from the oven and place the pan on top of the stove, allowing it to cool for a few minutes.

-While the meatballs are cooking, remove the rolls from the package and cut in half, placing close together on the second sheet pan.

-Place a ½ slice of provolone on the rolls. They can touch or overlap slightly.

-Place the warm meatballs on top of the cheese. Spoon PICS Marinara onto each meatball, then sprinkle with Italian Seasoning.

-Place second piece of cheese on top of the sauce, and top with the rest of the sliced bun.

-Brush the tops of the sliders with melted butter, and sprinkle with additional Italian Seasoning.

-Cover with foil and bake for 15-20 minutes, or until cheese is melted and meatball internal temperature is 145 – 160 degrees.


-While the sliders are baking, using the clean paring knife and clean cutting board, make the cucumber salad. Depending on the number of people you are serving, plan ½ cup sliced onion for each cucumber, assuming they are average size. If you prefer, peel the cucumbers with the vegetable peeler, then slice. I like to peel stripes for a nice presentation and added texture. Place cucumber slices and onion in the bowl.  In a liquid measuring cup, pour ½ cup of white vinegar, ½ cup water, 2 teaspoons of sugar, and 1 teaspoon table or Kosher salt. You can also use apple cider vinegar if you prefer a sweeter vinaigrette, and a pinch of dried dill or parsley. Toss and set aside to serve with the sliders.


Meal 2: MMMMMeatloaf Dinner – Sheet Pan Easy

Essentials: 2 Simply Done Gallon Storage Bags, 2 Sheet pans, Simply Done Aluminum Foil, 1 cutting board, 1 chef knife, small saucepan, wooden spoon, large tongs, meat thermometer

From the Pantry: PICS Olive Oil, Cayenne pepper or other favorite spice.

Food Safety Smart – Wash produce before preparing, leaving the skin on the sweet potatoes and leaving the green beans in the colander to dry.  Wash hands before and after handling raw meatloaf, even if you are using the plastic bag hack.

Directions:

-Preheat oven to 375 degrees.

-Prepare 2 large sheet pans with Simply Done Aluminum foil. Spray both pans with PICS Vegetable Oil.

-Hack – (optional) – using plastic bags as “gloves”, remove the Meatloaf Mix from the package and place it on one of the sheet pans. (You can also use bare hands, and wash again before touching other food or utensils.) Shape the meatloaf to a low, rounded loaf shape. Remove and discard the plastic bags. Wash hands again, and place the meatloaf pan in the oven, lower rack. Set a timer for 10 minutes.

-On the cutting board with the chef knife, cut the sweet potatoes into 4 lengthwise wedges each. Place them the second sheet pan on one end of the pan, skin side down, slightly apart. Lightly spray with PICS Vegetable Oil, and sprinkle with a pinch of cayenne or Cajun seasoning. When the set timer rings, open the oven, and place the second sheet pan on the upper rack. Set the timer for 10 minutes.

-Place the colander in the sink, or on a paper towel. Pour 2 TBSP of PICS Olive Oil over the green beans in the colander, tossing with the tongs to coat in the oil. Season with a sprinkle of garlic powder, if you like.

-When the timer goes off the second time, remove the upper rack sheet pan, spray again with vegetable oil, and spread the green beans on the empty side of that pan. Return the pan to the oven and set the timer for 10 more minutes.

-Combine beef gravy mix with approx. 1 cup of cold or boiling water, stirring vigorously with a whisk for 1 minute. Heat and simmer for another minute, stirring occasionally.

-When the timer goes off the third time, test the meatloaf with the thermometer. It should be about 158-160 degrees. Continue cooking until temp reads 160, 5 – 8 more minutes if needed. Remove the pan to the stove top. You can also check the tenderness and color of the sweet potatoes and green beans, removing them to a heat safe surface when the wedges are lightly browned, and the green beans are roasted and tender. Allow the meatloaf to rest for about 5 minutes before slicing. Divide the vegetables on 4 plates, along with sliced meatloaf. Add gravy as desired, and serve it up! MMMMMM……….

Facebook
Twitter
Pinterest

This week we are reeling in some delicious shrimp meals for all our shrimp fans! Our first meal highlights the delicious taste of garlic and soy sauce, while our second recipe explores the tropical flavor of sweet pineapple. Before we jump in, let’s take a look at this week’s meal items.

Lemon Garlic Shrimp

1 lb. Market 32 Raw Shrimp

1 bag (32oz) PICS Original Enriched Long Grain White Rice

1 bag (10.5oz) PICS Frozen Cauliflowered Rice

1 Lemon

1 Garlic Glove 

1 Container Nature Sweet Cherubs

Shop for Lemon Garlic Shrimp!

Shrimp Pineapple Stir Fry

1 lb. Market 32 Raw Shrimp

1 bag (32oz) PICS Original Enriched Long Grain White Rice

1 bottle (10oz) PICS Teriyaki Sauce

1 Whole Pineapple

1 bag (16oz) PICS Frozen Onions & Peppers

Shop for Pineapple Stir Fry!

Meal 1: Lemon and Garlic Butter Shrimp and Cauliflower Rice Casserole

This can be a planned or last-minute meal! If you can plan, defrost bag of shrimp overnight in the refrigerator. (Hack – place the bag in a glass container or on a dinner plate to catch any melting water from the package.) If not, you can quickly defrost shrimp under cool running water when you are ready to cook.

Wash and dry lemon. Slice in half, and slice 4 thin rounds for garnish. Zest the lemon halves, placing zest in a small bowl. Juice the lemon halves and set aside in a measuring cup or small bowl.

Preheat oven to 200 degrees.

Remove tails from raw shrimp, rinse and place them on a clean plate or bowl. (Flavor Full Hack – If you like, you could add herbs and spices to the raw shrimp, such as Italian Herb Blend or Sriracha sauce. Both will blend well with the lemon, garlic, and butter.)

Use a large saucepan and follow package directions to prepare 4 cups of whole grain brown or white rice. When rice is cooked, fluff with a fork, remove half and place into a bowl to cool. Return pot cover to keep warm.

While rice is cooking, pour about 2 TBSP oil in the skillet, and turn heat on to medium high. When oil begins to heat up, add garlic. Stir, allowing garlic to lightly brown and flavor the oil. Remove from oil and keep next to the stove in a small bowl.

Add cherry tomatoes, allowing them to soften and split, when they are tender, add the cauliflower rice and lemon zest. Stir to combine and heat the cauliflower rice through.

Remove veggies to a shallow casserole dish and add two cups of prepared rice to the casserole. Add the browned garlic. Mix gently, cover with foil, and place the casserole dish in the warm oven.

Return skillet to the burner and add 1 Tbsp PICS Olive Oil and the 2 TBSP of PICS Unsalted Butter. Heat at medium temperature until butter is melted, (don’t allow the butter to burn).

Add the shrimp and lemon juice to the skillet, and sauté quickly until shrimp are opaque and firm.

When done, remove the casserole dish with veggies and whole grain rice from the oven. Add the shrimp and all the liquid from the skillet, using the wooden spoon to scrape any bits. Divide into 4 servings, and garnish with the lemon slices. Enjoy! 

Leftover love – if there is any! Make the leftovers a work lunch – drain and rinse a can of PICS white beans. Mix 1.2 cup into the shrimp and rice for a pop of plant-powered protein that plays well with the flavors in the casserole and powers you through your busy workday!

Meal 2: Teriyaki Pineapple Shrimp and Rice Stir-Fry

The fresh pineapple makes this stir-fry special! Using the leftover rice from the first prep day saves time and budget, along with the frozen onions and peppers – already prepped and can go from freezer to pan. Bonus – you enjoy 2 servings of seafood in one week, as recommended by the Dietary Guidelines for Americans!

Defrost bag of shrimp overnight in the refrigerator. (Hack – place the bag in a glass container or on a dinner plate to catch any melting water from the package.) If not, you can quickly defrost shrimp under cool running water when you are ready to cook.

Place leftover prepared rice in the bowl with a ¼ cup of water. Cover and place in the microwave, but do not heat until you are ready to serve the Shrimp and Vegetables.

Remove frozen veggie bag from the freezer and open it, leaving it ready near the stove.

Wash hands and place pineapple on the cutting board. Cut off the bottom of the pineapple, then stand on end and slice the hard skin off, using the top to hold it steady. Slice the pineapple off into long spears, trimming the top end off, and set half aside. Chop the remaining half into bite sized pieces.

Place skillet on the stove. Add oil and turn on to medium heat. Add frozen veggies to skillet, allowing them to soften and for 2 – 3 minutes, or until defrosted and softened. Add the defrosted shrimp, moving quickly around the skillet. When shrimp is almost fully cooked, add ½ cup Teriyaki sauce, and stir to combine with the sauce and veggies.

Warm rice and water in the microwave for 2-3 minutes, fluffing with a fork once to heat evenly. Divide rice and plate, then top with stir-fried shrimp and vegetables. Enjoy!


Double Bonus! Caramelized Pineapple Dessert – Chop remaining fresh pineapple into bite-sized pieces. Heat a large skillet or griddle and melt 2 – 3 TBSP butter. When butter is melted, add ¼ cup of PICS Light Brown Sugar and a dash of salt. If you like, you can also add ½ tsp vanilla. Bring butter mixture to a simmer. Add the chopped pineapple, stir to coat the pieces, and raise heat to medium high, allowing it to reach a low boil. (If needed, you can add another TBSP butter.) Cook, stirring occasionally, for about 6 minutes, ensuring the sugar doesn’t burn. Remove from heat and allow to cool slightly – serve as is, OR top with PICS Whipped Cream, OR over PICS Vanilla Ice Cream. Whatever you do, don’t leave the kitchen or it will be gone before you come back! Caramelized pineapple can also be stored in a covered, microwaveable dish in the refrigerator, and served cold or reheated within 3 days. YUM!

Facebook
Twitter
Pinterest

Ellie Moloney Wilson

MS, RDN, CDN

We are back with a St. Patrick’s Day edition of our Value Meals! Take a look below at this week’s meal planning items:

Meal 1: Corned Beef & Cabbage

1 lb. Shannon Farms Flat Cut Corned Beef Brisket

5 lbs. bag Market 32 Red Potatoes

1 lb. bag Full Circle Whole Carrots

3 lbs. (about 1 head) Green Cabbage

Shop Corned Beef & Cabbage items here!

Meal 2: Reuben Sandwich

1 lb. Shannon Farms Flat Cut Corned Beef Brisket

1 loaf Market 32 Rye Bread

1 package PICS Sliced Swiss Cheese

1 jar (14oz) PICS Sauerkraut 

1 jar (24oz) PICS Pickle Spears

Shop Reuben Sandwich items here!

There are a few weeks of the year when you know what you will be having for dinner, and in my family, this is one of those weeks!  The ingredients are well-known and on sale this week, so classic this meal would almost make itself, if you don’t have a family recipe or a friend who always makes enough for the neighborhood. I, of course, have the best recipe – my Aunt Sheila’s, written down about 25 years ago on a now slightly crumpled, “well-seasoned” piece of paper. The ink is smudged, splashed by something at some time but rescued and dried and saved in the recipe box every year since.  

Planning this blog got me thinking about meal traditions, how they connect us generationally and how they are reinvented over time – cooked in different pots and ovens, with spices or not, braised and baked and boiled – how many ways can this meal be made? Then I googled “Corned Beef and Cabbage” and got this: About 46,900,000 results! 

That is impressive! As I scrolled through, the descriptions told the story of its travels over time -Grandma’s, Mom’s, Dad’s, slow cooker, Southern-style, Instant Pot, and more. Top 40 recipe collections for every food magazine or cooking show, fancy, saucy, and crispy. The corned beef and cabbage meal tradition we know in America has roots in Ireland, but was reinvented and expanded in New York City, when the migration of Irish to America exploded in the late 1800’s, and the community connection of Irish and Jewish residents in neighborhoods with kosher butchers restored access and enjoyment to this iconic meal. *

Meal 1: Corned Beef & Cabbage

There are so many ways to cook corned beef, I thought it would be best to share this link How Long Should I Cook Corned Beef and “season” the blog with hacks and tips.

In case you don’t have a family recipe, we have one for you try: Classic Corned Beef with Cabbage & Potatoes (beefitswhatsfordinner.com)

  1. Tip – Cook both briskets/roasts at once and store the second wrapped in the refrigerator for the Reuben Sandwich meal. For best results, do not slice the second roast until you are preparing the sandwiches.
  2. Hack – When the brisket is done according to your recipe, wrap it in foil and place in a small cooler or in an oven set on 150 degrees to rest and redistribute juices into the meat. Rest for at least 45 minutes, ideally up to 2 hours, checking to be sure the internal temperature doesn’t go below 140 degrees. When you are ready to serve, be sure to slice against the grain, or the meat will shred into a stringy (but still delicious) pile versus a juicy, servable slice.

Meal 2: Grilled Reuben Sandwich (or Panini!)

The Reuben is a classic – juicy, savory and succulent, it is an icon by itself. It is also easy to prepare if you already cooked the corned beef.

  1. From the pantry – PICS Thousand Island Dressing and PICS Unsalted Butter, softened.
  2. Utensils – Sharp chef’s knife, large, flat spatula for turning the sandwich, fork or tongs for the sauerkraut.
  3. Prepare a large frying pan with a flat base or a griddle with a spray of PICS Vegetable Oil. Keep a large pot top available to assist with heating the sandwiches and ensuring the cheese melts.
  4. Hack – warm canned PICS sauerkraut in a saucepan. Keep a large fork or tongs handy to place kraut on the sandwich.
  5. Slice the brisket against the grain, into thin slices.

Set up your sandwich ingredients – sliced rye bread, sliced corned beef, warmed sauerkraut, sliced Swiss cheese, dressing and butter. When you are ready to assemble, turn the burner heat to low-medium for the pan or griddle.

  1. Place 4 slices of rye bread on a counter or cutting board and spread 1 TBSP PICS Thousand Island Dressing on one side.
  2. Place a slice of Swiss Cheese on the dressing.
  3. Using the fork or tongs, place warmed, drained kraut (hold over the pot to drain for a few seconds) on the cheese.
  4. Place several slices of corned beef on the sauerkraut.
  5. Take the top slice of bread and spread 1 TBSP of PICS Thousand Island Dressing on one side. Place the dressing-side down on the sandwich.
  6. Butter the top side of the sandwich bread.
  7. Repeat the procedure for all 4 sandwiches.

When you are ready to grill, place some butter in the pan to melt. Carefully transfer the 4 sandwiches to the pan. Place the pot top over the sandwiches or pan to concentrate the heat and melt the cheese. Grill until golden brown on both sides, flipping the sandwiches after 3- 4 minutes. Serve with pickles, Cole slaw and LOTS of napkins!  Enjoy!   

*Accessed 3/4/2028; https://www.foodandwine.com/news/complicated-irish-history-corned-beef

Facebook
Twitter
Pinterest