


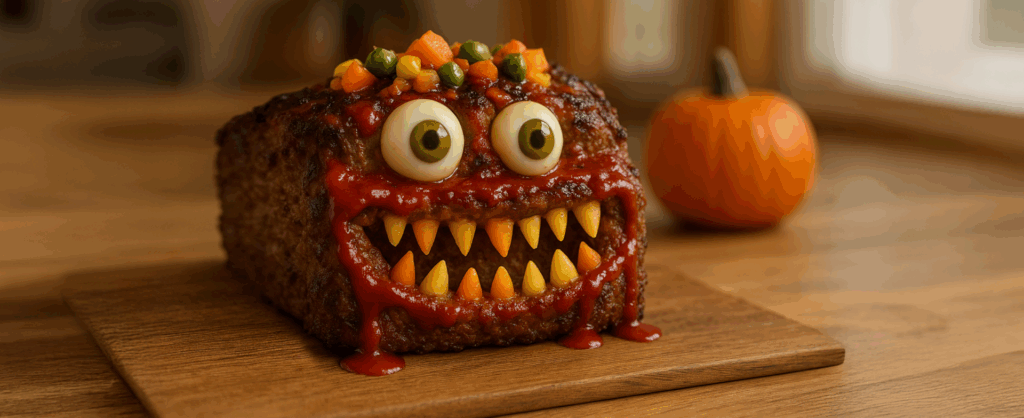
Monster Meatloaf Recipe
1 medium onion, diced
2-3 garlic cloves, finely chopped
1 Tbsp olive oil
2 eggs
¾ cup milk
1.5 cups Italian breadcrumbs
2 pounds 80% lean ground beef
1 teaspoon oregano
2 teaspoons dried parsley
1 tsp paprika
1 teaspoon salt
½ teaspoon black pepper
1 Tbsp Worcestershire
½ cup barbecue sauce
Creature features:
One hard-boiled egg
Two green olives
Several carrots
Preheat your oven to 350 degrees F. Line a baking sheet with foil and coat with non-stick spray, or parchment paper, then set aside.
Heat the olive oil in an 8-10” fry pan on medium. Add chopped garlic and diced onions. Stir and sauté until the onions are translucent and just browning. Remove from heat and transfer to a plate or bowl to cool slightly.
In a large bowl combine all ingredients for the meatloaf and mix with your hands, until fully combined. Be careful not to overmix. Press the meatloaf mixture into loaf (approx. 8″ long x 4″ wide) on the prepared baking sheet. Add some more barbecue sauce to the top for added flavor.
With your thumb and fingers create two depressions on the top of one side about the size of an egg each, which will become the eye sockets for your monster. Carve out an area below these depressions where the mouth will be.
Place in the oven and bake for 50-60 minutes, until the internal temperature reaches 160 degrees in the center.
Remove from oven and let the meatloaf rest for about 5 to 10 minutes.
Finish your creation!
Spread barbecue sauce over the top of the meatloaf (or ketchup for an especially gruesome appearance!).
Cut a few carrots into double-pointed/diamond shapes and push them into the meatloaf on the upper and lower portions of the mouth for teeth.
Peel off the shell and cut the hard-boiled egg in half. Place one half egg into each of the two eye socket depressions (with the rounded part of the egg facing out). With a paring knife, cut some egg out of the center of each half. Place the olives in these holes.
Be creative with the top of the creature’s head: add a scoop of mixed vegetables (as shown in the photo), steamed broccoli crowns, mashed potatoes, or your favorite side.
Fear not! Enjoy!
Mia Teal
Marketing Coordinator, Paid Media
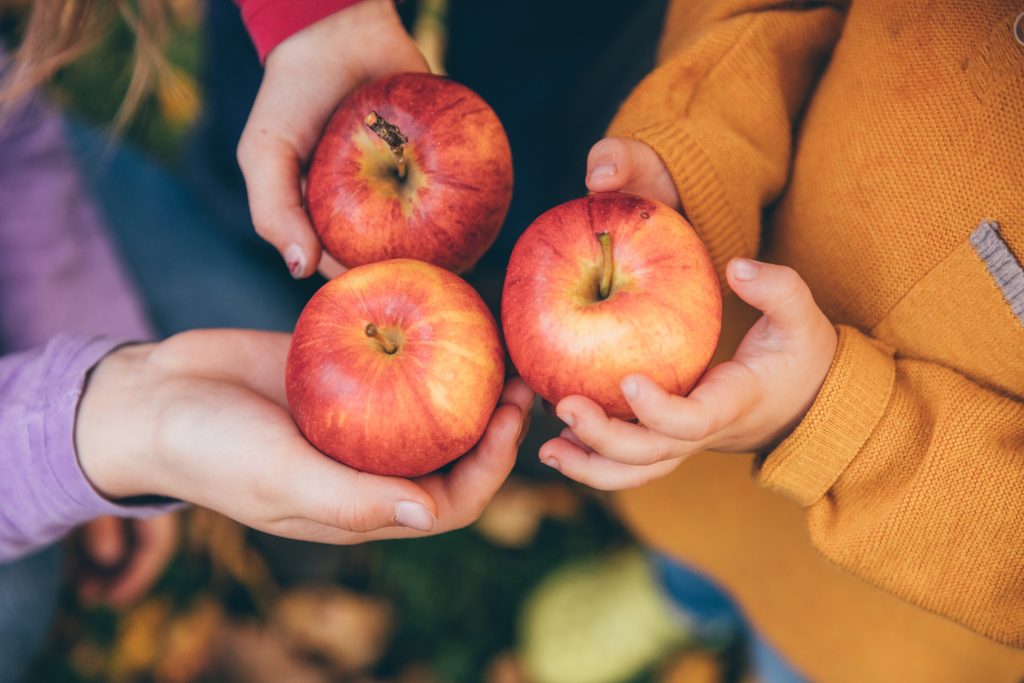
You know what they say about eating an apple a day! Today is National Apple Day, so what better way to celebrate than with Price Chopper and Market 32. We have a variety of apples to choose from, so make sure you browse our apple collection at the end.
Apples are more than just a popular fruit; they’re a symbol of crunchiness, sweetness, and wholesome goodness. From the refreshing sip of apple cider to the warm comfort of a homemade apple pie, these fruits have woven themselves into the fabric of our lives and culture. Oh, and we should mention our locally sourced Market 32 Apple Cider.
There are so many different types of apples out there that it may even be a little overwhelming. Fear not, let us take you through the journey of sweetness! We have picked six types of apples that we carry to feature here today. Let’s take a look…
Honey Crisp: The Honey Crisp Apple tends to be larger in size, juicy, and sweet. This variety is great for pie and applesauce.
Granny Smith: Granny Smith Apples are bright green, tart, and subtly sweet. These apples also work well in pies or sauce.
McIntosh: McIntosh apples tend to be on the medium to smaller. These apples are red with green spots, and have a tart taste.
Fuji: Did you know that Fuji Apples originated in Japan? How cool is that? These apples are red with areas of yellow and tend to be sweet and firm.
Cortland: The Cortland Apple has a vibrant red hue and features a refreshing, juicy white flesh. This variety tends to be tarte.
Pink Lady (Cripps Pink): The Pink Lady Apple is beautifully bright pink in color, and is most flavorful at room temperature.
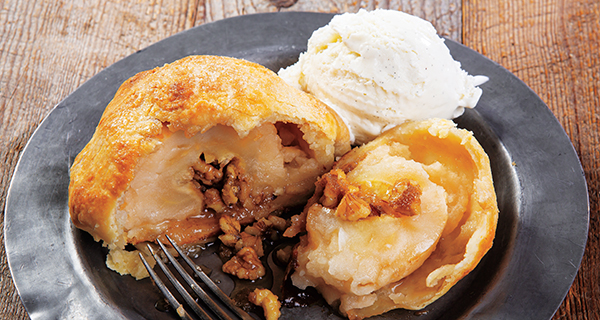
Check out some recipes below for apple picking season!
Apple Dumplings: Warm apple dumplings are perfect for the cold weather approaching! Pair with PICS Vanilla Ice Cream for the ultimate duo.
Oven Grilled Cheese with Apples: Apples and cheese are a spectacular combo! Check out your soon-to-be new favorite recipe!
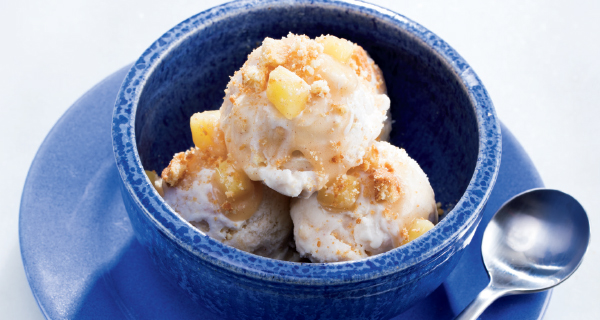
No-Churn Brown-Butter Apple Pie Ice Cream: When you make apple pie for your Thanksgiving feast, top it off with this ice cream! It is sure to be a hit!
Air Fryer Apple Churros: You may have had a cinnamon sugar churro, but how about an apple churro in the air fryer? Stop what you are doing and check out this recipe!
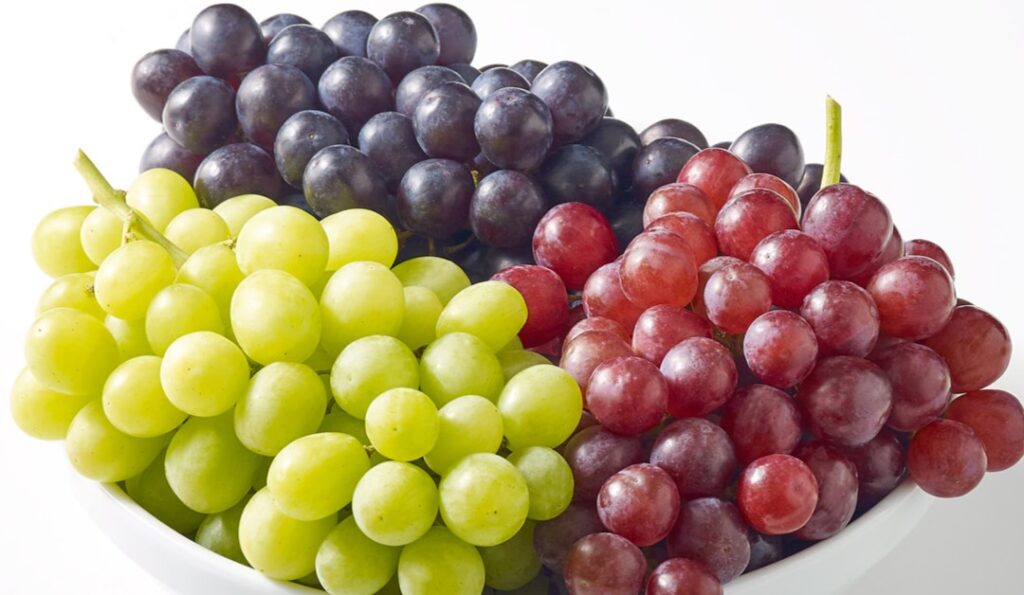
As autumn paints the landscape with brilliant reds, oranges and golds, there’s no better way to embrace the season than with a leaf-peeping adventure paired with a beautiful fall charcuterie board featuring California Table Grapes as the star. These sweet, juicy gems not only provide the perfect contrast to rich autumn cheeses and savory cured meats, but heart-healthy grapes are a convenient and easy take-along on your fall fun adventures. Whether you’re hiking to a scenic overlook or settling in for a picnic among the fallen leaves, California grapes bring vibrant, visual appeal and fresh flavor to your fall spread. Let the season’s bounty inspire your next fall adventure with a charcuterie board that celebrates both the beauty of fall foliage and the peak harvest season of California’s supreme grapes.
Why Choose California Grapes?
California Grapes are a Fall Fruit: With a season that starts in May and runs into January, fresh California grapes are widely available throughout the fall, delivering crisp, juicy sweetness.
- Vibrant Variety: Mix red, green and black grapes for a visually stunning charcuterie board.
- Pairing Power: Their natural sweetness balances salty cheeses, savory meats and crunchy nuts.
- Healthful and Crowd-Pleasing: Not only are California grapes incredibly delicious, they’re nutritious too. Grapes have no fat, no cholesterol, virtually no sodium and no added sugar! Grapes are also a good source of Vitamin K and a natural source of antioxidants and other polyphenols. Research shows that table grape consumption helps support heart health and may help promote healthy aging.
Build Your Board
Ingredients:
-1 bunch each of red, green and black California grapes (clip into small, easy-to-grab clusters)
-2-3 types of cheese (try a mix of soft brie, sharp cheddar and creamy blue)
-Swap out a blue/roquefort for these Grape Roquefort Canapés for a perfect blend of sweet, salty and nutty flavors.
– 2-3 cured meats that range in flavor from mild to spicy and vary in texture (salami, prosciutto, soppressata, Spanish chorizo)
-Nuts (almonds, walnuts or pistachios)
-Sweet (honey, fig jam or homemade preserves) and/or savory spreads (mustard, caramelized onions)
-This simple relish adds both a naturally sweet, gently tangy pairing for your charcuterie spread.
-Crackers, crostini, and sliced baguette
-Olives and pickled vegetables
Assembling Your Board
-Start by placing clusters of grapes in several spots on the board to anchor your charcuterie display with color and freshness.
-Add cheese wedges or cubes, spacing them around the grapes.
-Layer in meats, rolling or folding meats like salami into a triangle or get creative and make a salami rose or rolling slices for visual appeal. (check out one of the many online tutorials)
-Fill small bowls with spreads, nuts and pickled items, then tuck them among the larger items.
-Use nuts to fill gaps and add texture.
-Serve crackers and sliced baguette on the side or in dry areas on the board to keep them crisp.
-Garnish if desired with fresh rosemary for a festive touch.
With their crisp sweetness and refreshing bite, California grapes bring balance to every charcuterie board and joy to every gathering – the perfect way to savor fall’s finest flavors and the season’s simple pleasures.

Written by our friends at Land O’Lakes
Everyone knows that convenience is key when getting through the week. But when it comes to snacks and meals, convenience doesn’t have to be boring. With Land O Lakes® Cheese, it’s easier than ever to add fun and flavor to your week and quickly turn a routine bite into something spectacular. If you’re struggling to create something quick and crave-worthy, check out some simple, yet delicious, recipe inspiration below!
Cheesy Hamburger Pasta
Creamy, cheesy, easy and satisfying—this homemade hamburger pasta dish hits all the right notes for a repeatable family meal. Plus, it only takes 40 minutes and one pot to create, so it fits perfectly into your busy schedule!
Sheet Pan Garlic Bread Grilled Cheese
Now you can eat that cheesy garlic bread you love for dinner in grilled cheese sandwich form. This sheet pan grilled cheese only takes 30 minutes and six ingredients to make. Plus, it also sets you up for the easiest possible clean-up! That’s what we call a win-win.
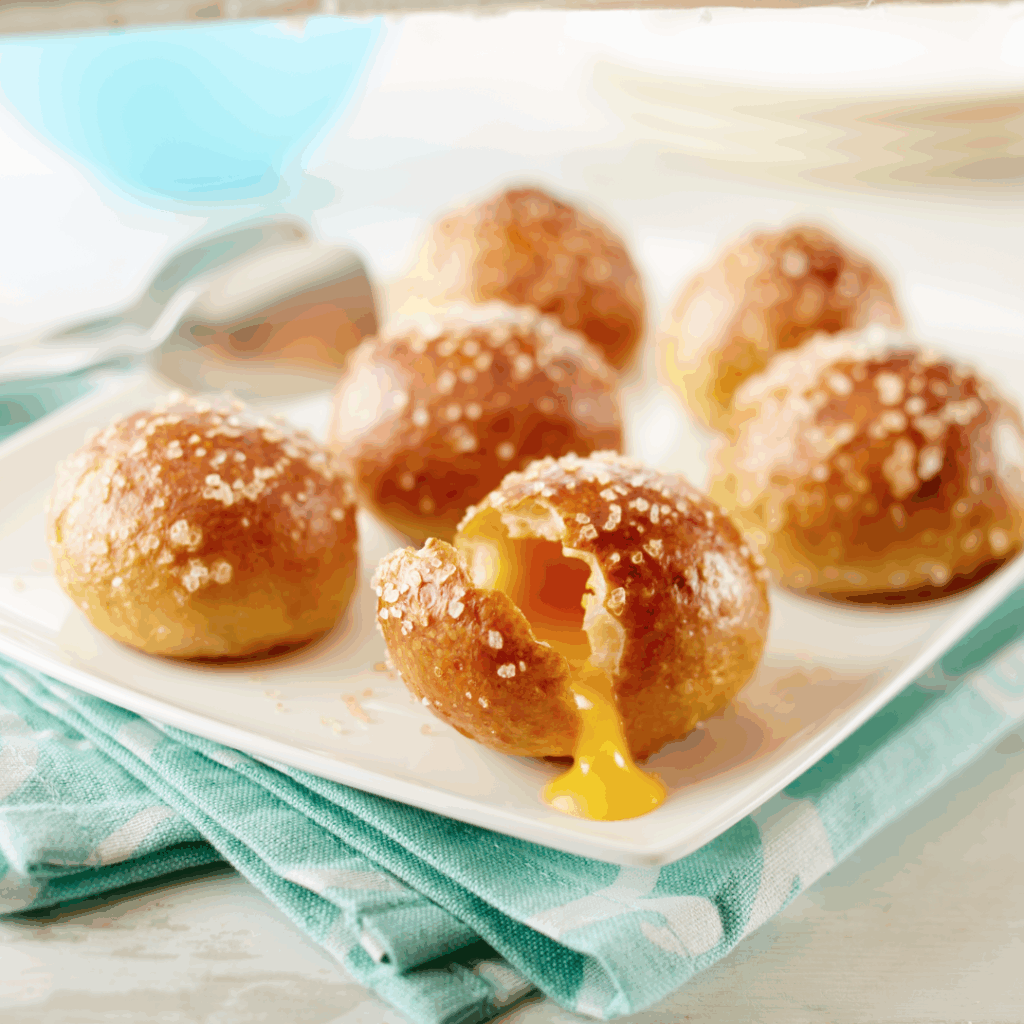
Cheese-Stuffed Pretzel Buns
The perfect after school snack. So simple to make and stuffed with delicious, melty cheese––yum! Just one bite and you’ll never look at a plain pretzel the same way again.
These are just a few options for quick and easy snacks and meals you can whip up with Land O Lakes® Cheese, but the opportunities are endless! Take any bite to the next level with creamy and delicious cheese. Pick up some Land O Lakes® Cheese at your local store today and let your creativity get cooking
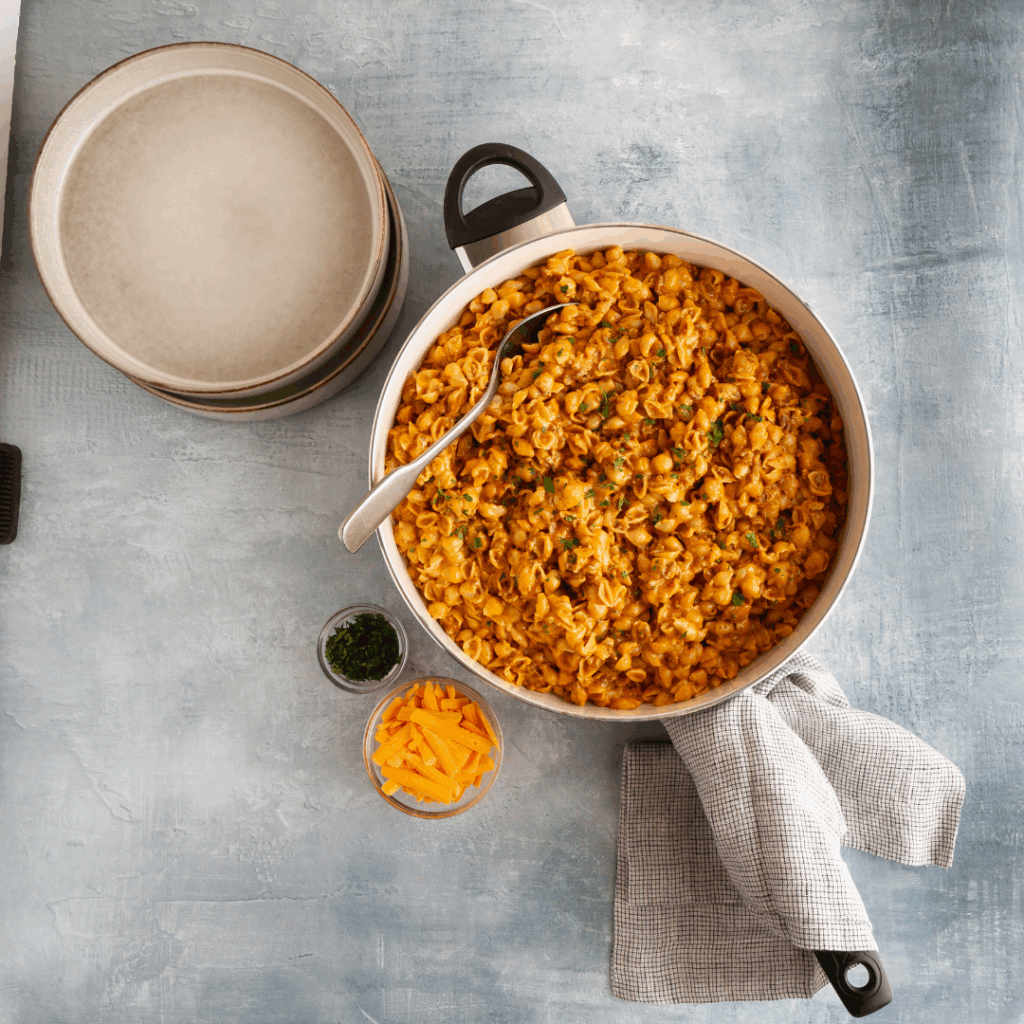

Cheesy Hamburger Pasta
Sheet Pan Garlic Bread Grilled Cheese
Cheese-Stuffed Pretzel Buns

National Corn Month
We’re proud to partner with local corn farms in the Northeast since 1932. So, for National Corn Month, we’re celebrating their hard work and dedication.
Corn is one of the top agricultural products in our region. By mid-to-late July, our home.grown. sweet corn season is fully underway, lasting until mid-September. We enjoy every minute of our corn season. Let’s a take a look at a few local suppliers.
Shaul Farms - Fultonham, NY
Since coming to the Schoharie Valley, the Shaul family has had 11 generations working on the farm to produce the finest cider, vegetables, and now garlic. Today, their primary production focus is high quality grain corn and fresh market vegetables. Their operation on the farm is diverse, allowing them to grind and sell corn meal, store and sell 250,000 bushels of grain corn, operate a retail road stand and sell vegetables to local Market 32 and Price Chopper stores. We are proud to work with them each season!

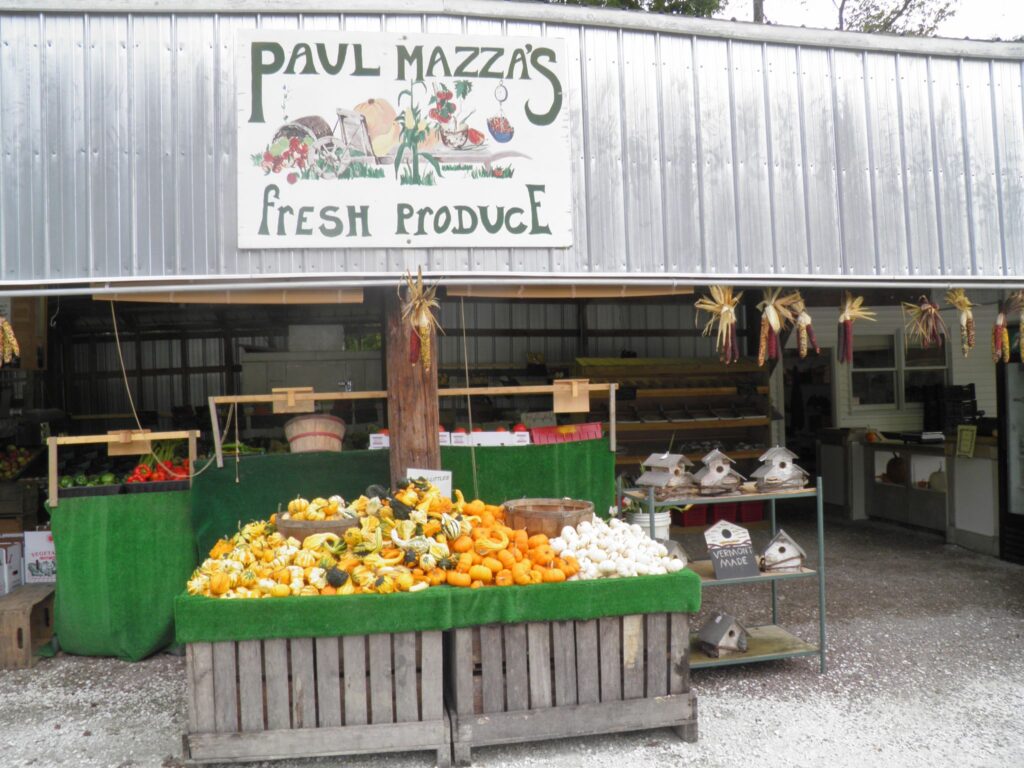
Paul Mazza's - Essex Junction, VT
For over 38 years, Paul Mazza’s has been providing their community with fresh, nutritious, delicious produce and a variety of locally sourced products. They take pride in producing the very highest quality fruits and vegetables all while keeping them affordable. Their produce can be found throughout Vermont, featured in our stores as well as local farm stands. We’re grateful to have them as partners each year!
Enjoy some corn-centric recipes...
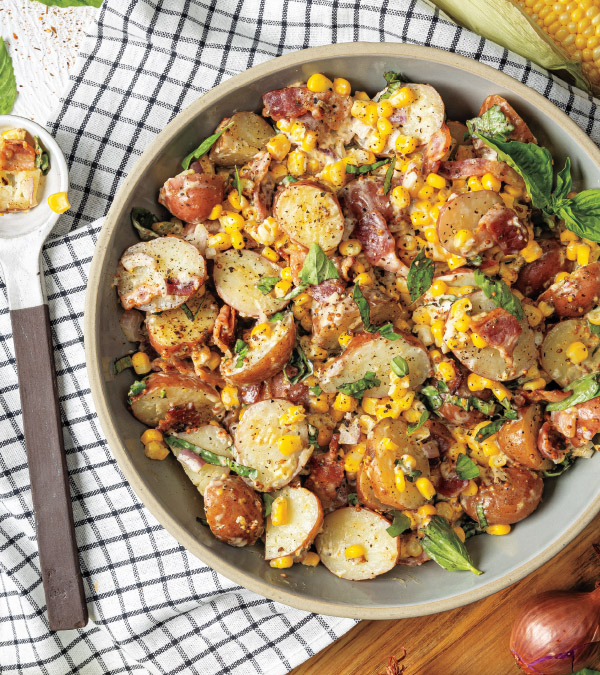
Summer Corn, Potato & Basil Salad
Enjoy as a summery side or a snack, full of refreshing ingredients.
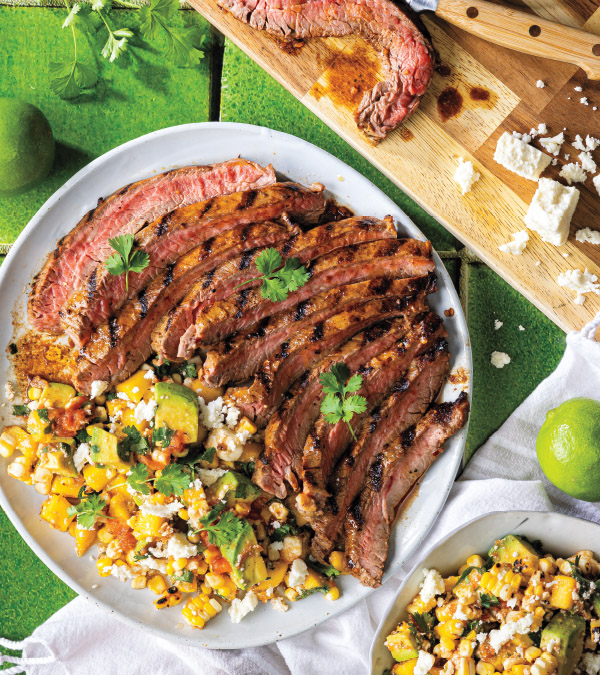
Grilled Flank Steak with Mango-Habanero Corn Salad
Enjoy some steak on the grill and pair it with the ultimate side dish, this Mango-Habanero Corn Salad. If you like a little kick, this recipe will be your new summertime go-to.
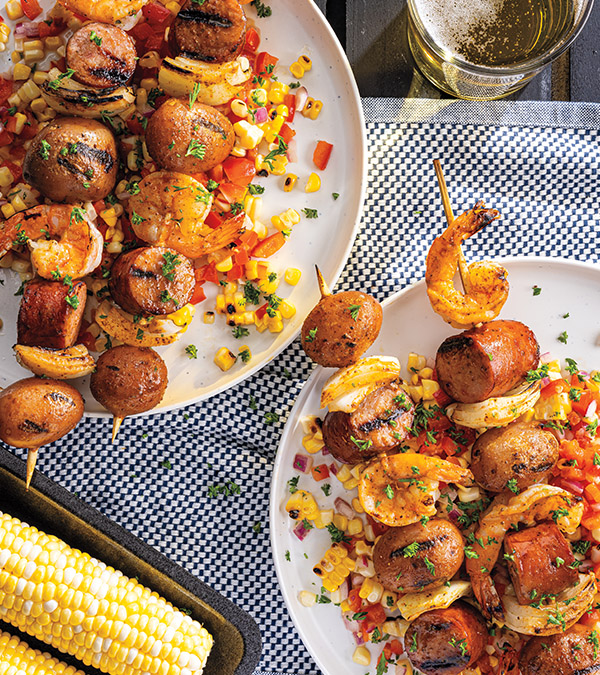
Grilled Shrimp Boil Skewers with Corn Salsa
Corn salsa serves as the perfect complement to grilled shrimp and sausage, and it’s perfect for summertime vibes.

Mia Teal
Marketing Coordinator, Paid Media
‘Tis the season for fresh veggies! June 16th is a date to mark on your calendar with a splash of color and a burst of flavor—it’s National Veggies Day! This vibrant day isn’t just about eating more of this food group; it’s about embracing the joy and creativity that vegetables bring to our lives. From their stunning colors and intriguing shapes to their endless culinary possibilities, veggies offer a feast for the senses. Here’s how you can celebrate this delightful day with enthusiasm and creativity.
- Create a Rainbow Platter: Assemble a colorful platter of fruits and vegetables. Think red bell peppers, orange slices, yellow corn, green cucumbers, blue blueberries, and purple grapes. This not only looks stunning but also adds a festive touch to your dining table.
- Food Photography: If you’re into photography, fruits and vegetables make excellent subjects. Their vibrant colors and unique textures can inspire beautiful food photography.
- Fruit and/or Veggie Infused Water: Enhance your hydration with fruit or veggie-infused water. Add slices of lemon, cucumber, strawberries, or mint leaves to your water pitcher. It’s a simple yet refreshing way to enjoy the essence of fruits throughout the day.
- Try a new recipe: Incorporating more veggies into your diet does not have to be a hassle. This can be as simple as tossing in some chopped up veggies in your rice. Check out some summertime recipe ideas below!
Check out more recipes here:
Burgers for Your Next BBQ
Summer is just about here, and folks all around the Northeast have already dusted off their grills and began a new season of backyard barbecuing. We share your excitement! And we’re ready for a fresh menu of summertime burgers. Check out some new burger recipes below to try for yourself!
Everything Cheeseburgers: A classic burger on the grill does the trick every time, especially when you add PICS Everything Blend Spice Mix.
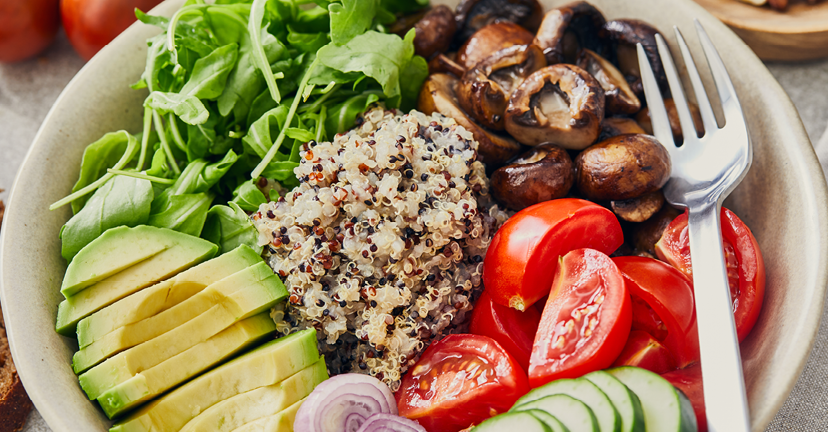
Mushroom-Swiss Burger Bowl: Enjoy your burger bowl-style, with this tasty mushroom and swiss take.
Smoky Turkey Burger with Smashed Avocado and Black Bean Salsa: These turkey burgers offer a lighter and refreshing option, with the summer’s day feel of avocado and salsa this recipe is a seasonal success.
Feta Stuffed Beef Burgers: These juicy Feta Stuffed Beef Burgers offer a savory twist packed with bold Mediterranean flavor.
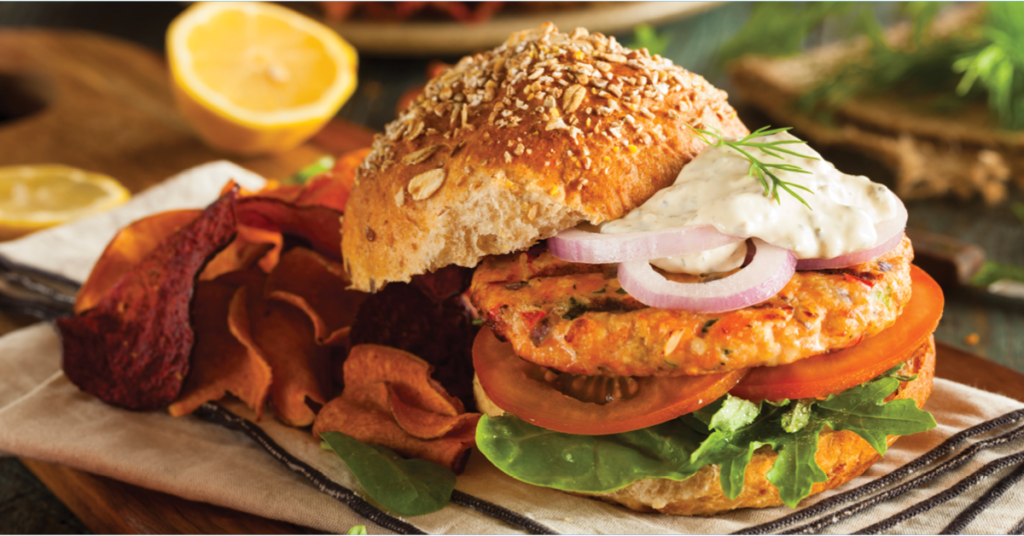
Salmon Burgers with Avocado and Asian Slaw: A perfect way to celebrate summer’s fresh flavors. With its crisp slaw, creamy avocado, and savory salmon, it’s a refreshing and satisfying choice for warm-weather dining.
Smash Burger Tacos: Crispy tortillas, juicy beef patties, and all the classic burger toppings wrapped into a handheld delight. Perfect for a fun weeknight dinner or a crowd-pleasing weekend meal.
Cheesy Turkey Burgers with Avocado Ranch Dressing: Juicy turkey patties topped with melted cheese and creamy avocado ranch dressing make these Cheesy Turkey Burgers a flavorful and satisfying choice.
Grilled Southwest Shrimp Burgers: Add a zesty twist to your summer grilling with these Grilled Southwest Shrimp Burgers—juicy shrimp patties seasoned with bold spices and served on a toasted bun.
5-Ingredient Grilled Chili-Pineapple Turkey Sliders: Add a tropical flair to your summer grilling with these 5-Ingredient Grilled Chili-Pineapple Turkey Sliders—juicy turkey patties seasoned with Tajín®, topped with smoky Canadian bacon and grilled pineapple, all nestled in sweet Hawaiian buns for a quick and flavorful bite.
Celebrating Mediterranean Cuisine
May is Mediterranean Diet Month and we’re celebrating with our favorite recipes from the cuisine. Mediterranean recipes are often light and refreshing, making them perfect for spring. Enjoy these recipes all month long!
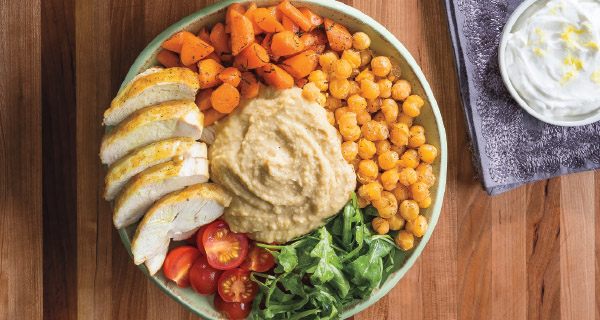
Grilled Yogurt Harissa Chicken Wraps: These Grilled Yogurt-Harissa Chicken Wraps features chicken tenderloins marinated in a zesty blend of plain nonfat Greek yogurt and harissa seasoning, then grilled to perfection. The grilled chicken is wrapped in sandwich wraps and complemented with fresh avocado slices, creating a satisfying dish.
Lamb Meatball Hummus Bowls These Lamb Meatball Hummus Bowls feature spiced lamb meatballs served over creamy hummus, topped with crisp cucumbers, juicy tomatoes, red onion, feta cheese, and fresh herbs. Often drizzled with tahini or yogurt sauce and paired with pita or rice, it delivers a balanced combination of savory, tangy, and fresh elements.
Greek Chicken Pitas with Dill Feta Sauce: These Greek Chicken Pitas with Dill-Feta Sauce feature grilled chicken seasoned with Mediterranean herbs, nestled in warm pita bread, and topped with a creamy dill-feta sauce. Complemented by fresh vegetables, it’s a satisfying dish that aligns well with the principles of the Mediterranean diet
Baked Kefta Zucchini Kabobs with Garlic Parsley Tahini Sauce: Baked Kefta Zucchini Kabobs with Garlic Parsley Tahini Sauce offer a flavorful and nutritious twist on traditional Middle Eastern cuisine. These kabobs combine spiced ground meat with tender zucchini slices, all baked to perfection. They’re served with a creamy tahini sauce infused with garlic and fresh parsley, adding a tangy and herbaceous touch. This dish is not only delicious but also aligns well with Mediterranean diet principles, making it a wholesome choice for any meal.
Chicken Shawarma Hummus Bowls: Chicken Shawarma Hummus Bowls are a flavorful and nutritious meal that combines marinated, spiced chicken with creamy hummus and fresh vegetables. The chicken is typically seasoned with a blend of spices such as cumin, paprika, turmeric, and cinnamon, then cooked until tender and juicy. Served over a bed of hummus, the bowl is often topped with ingredients like cherry tomatoes, cucumbers, red onions, and feta cheese, and can be accompanied by pita bread or rice.
Roasted Beet Salad: This Roasted Beet Salad recipe is a vibrant and wholesome dish that highlights the natural sweetness of oven-roasted beets. This salad combines the earthy flavor of beets with fresh greens and a tangy vinaigrette, creating a delightful balance of tastes and textures. It’s a perfect side or light main course that aligns well with Mediterranean diet principles.
Hummus Stuffed Cherry Tomatoes: These Hummus-Stuffed Cherry Tomatoes are a delightful and healthy appetizer that combines the creamy richness of hummus with the juicy sweetness of cherry tomatoes. These bite-sized treats are perfect for parties or as a light snack.
Herbed Tahini Dip: A creamy, flavorful spread that blends tahini with fresh parsley, chives, garlic, lemon juice, olive oil, and a touch of honey. This versatile dip is perfect for pairing with crisp vegetables, pita chips, or as a sandwich spread.
Mia Teal
Marketing Coordinator, Paid Media
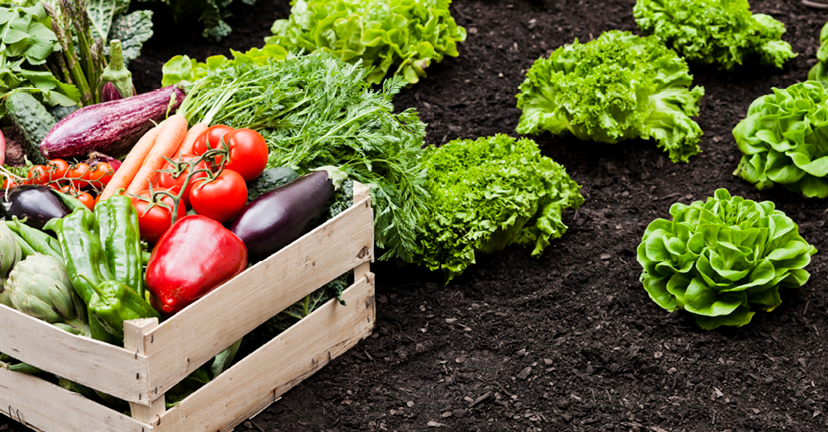
It is that time of year again where many people will start up gardening. Gardening is a great way to save money on your favorite vegetables and get a great deal of exercise in as well. Additionally, did you know that gardening actually helps the environment? Growing your own vegetables helps reduce carbon emissions. So what are we waiting for? Let’s get growing!
Tips & Tricks on Gardening Favorites
We picked out three commonly grown vegetables and provided some tips and tricks on how to succeed this gardening season. Find out how below!
Tomatoes:
- Tomatoes, like people, love the sunshine! Make sure that your tomatoes are in a position where they will get ample sunshine to grow strong.
- Tomato plants can be planted a lot deeper than other vegetables. A full two-thirds of the plant should be underground. Seeds should be planted one-eighth of an inch underground. By planting tomatoes deeper in the soil, you are allowing for stronger, more resilient roots.
- Tomato plants need 1-2 inches of water in total per week. Remember not to do this all at once.
Peppers:
- Unlike tomatoes, peppers must be in a shaded area, as they are very sensitive to heat.
- Peppers require 1-2 inches of water per week, but make sure to space out your waterings. Peppers need days in between for dryness. Slow dousings of water are beneficial for peppers.
- Plant peppers 18-24 inches apart.
Carrots:
- Carrots require a lot of sunshine – about 6-10 hours a day.
- Carrots are slow to germinate. They typically require 2-3 weeks to emerge, so don’t give up on these guys!
- Water carrots frequently, but do not douse them as you would with peppers. A shallow watering will do.
As you start harvesting your crops, you will want to make some homemade meals out of them. Check out some of our recipes below!
Grilled Veggie & Quinoa Bowl: This fresh blend of vegetables includes tomatoes, corn, green onions, and avocado, however, add in more of your garden vegetables for even more color!
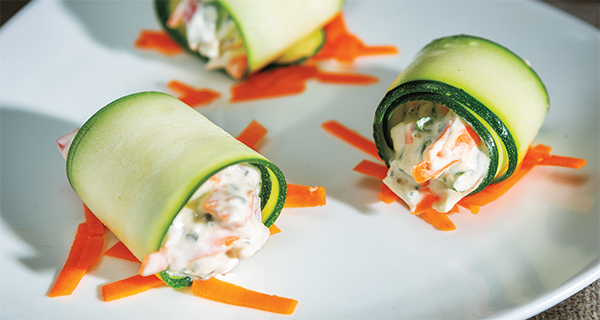
Zucchini-Vegetable Rolls: With only 5 ingredients, this is a great appetizer to put out for your Mother’s Day or Memorial Day celebration. The only ingredient you would have to purchase is the PICS cream cheese!
Shrimp and Grits Stuffed Peppers: Fresh peppers from the garden with delicious seafood and grits…Need I say more?
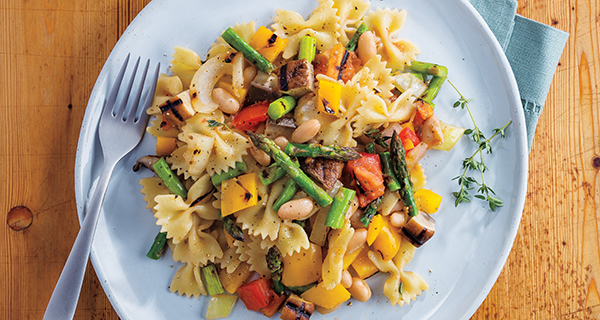
Grilled Vegetable Pasta Salad: What is an outdoor barbeque without the pasta salad? Better yet, you have our permission to brag about your freshly-grown garden vegetables in this salad!
Shop Our Seed Packets
Spring Into A New Recipe
Jon Waiksnoris
Digital Marketing Coordinator, New Recipe Enthusiast
Spring has sprung! Time to get outdoors, grill, picnic, enjoy the weather and refresh your at-home menu with seasonal twists. Check out some of our favorite recipes for Spring below, you’re bound to find something you love!
Coconut Lemongrass Poached Cod: A light and aromatic dish that combines tender cod fillets with a fragrant broth made from coconut milk, lemongrass, ginger, and fish sauce. This quick and healthy recipe is perfect for a weeknight dinner, offering a delightful blend of Thai-inspired flavors in under 30 minutes.
Chipotle Pulled Pork Sandwiches: A smoky, spicy twist on a classic comfort food. Tender pulled pork is combined with chipotle seasoning, creating a flavorful filling for sandwiches. For an extra burst of flavor, consider adding avocado, Pico de Gallo, and fresh cilantro.
Tequila Lime Shrimp Skewers with Grilled Fruit Salsa: A vibrant and flavorful dish perfect for spring and summer grilling. Succulent wild Argentinian shrimp are marinated in a zesty blend of tequila, lime juice, garlic, cilantro, and brown sugar, then grilled to perfection on skewers. Paired with a smoky-sweet salsa featuring grilled plums, nectarines, pineapple, red onion, mint, and jalapeño, this recipe delivers a delightful balance of tangy, spicy, and sweet flavors that’s sure to impress at any cookout.
Thai Shrimp Zoodle Bowl: Combines tender shrimp with zucchini noodles, tossed in a tangy Thai-inspired sauce featuring honey, soy sauce, peanut butter, chili garlic sauce, and fresh lime juice. Quick to prepare, this meal is garnished with red bell pepper, cilantro, and dry roasted peanuts, offering a delightful mix of flavors and textures.
Smoked Salmon Flatbread: A quick and elegant dish that combines the rich, smoky flavor of salmon with a creamy base and fresh toppings. Ideal as an appetizer or light meal, it offers a delightful balance of textures and tastes.
Ricotta Toast Bowl: A delightful twist on the classic toast, featuring creamy Galbani Whole Milk Ricotta Cheese blended with grated Parmesan, fresh herbs, and a hint of lemon zest. Served over toasted bread and topped with seasonal fruits or vegetables, it’s a versatile dish perfect for breakfast, brunch, or a light snack.
Zucchini Fritters: A simple and delicious way to enjoy fresh zucchini. Made with just a few ingredients, they offer a crispy exterior and tender interior, making them perfect as an appetizer or side dish.
Foil Baked Mediterranean Tilapia: A light and flavorful dish that brings together the fresh tastes of the Mediterranean. Featuring tender tilapia fillets baked in foil with ingredients like lemon, kalamata olives, cherry tomatoes, red onion, and fresh basil, this recipe offers a quick and healthy meal option that’s ready in just 15 minutes.
Grilled Swordfish Kabobs with Peanut Chili Sambal: A bold and flavorful twist on a classic seafood dish. Featuring tender chunks of swordfish marinated in a spicy peanut-chili sauce, these kabobs are grilled to perfection, delivering a delightful combination of smoky, nutty, and spicy flavors.
Loaded Mashed Potato Egg Rolls: A creative fusion of comfort food and crispy indulgence. They feature creamy mashed potatoes blended with savory bacon, green onions, and seasonings, wrapped around cheddar cheese sticks in egg roll wrappers, then fried until golden brown. Served with sour cream for dipping, these egg rolls offer a delightful twist on traditional mashed potatoes, making them perfect for appetizers or a fun snack.
Grilled Flank Steak with Mango-Habanero Corn Salad: A vibrant, spring and summer-ready dish that combines smoky grilled flank steak with a sweet and spicy corn salad. The salad features fresh corn, ripe mango, and a kick of heat from habanero peppers, creating a refreshing contrast to the savory steak. This recipe offers a bold and flavorful meal that’s perfect for outdoor gatherings or a special weeknight dinner.
Grilled Balsamic Steak Gorgonzola Pizza: A gourmet twist on classic pizza, featuring tender grilled sirloin steak, caramelized shallots, and tangy Gorgonzola cheese atop a crisp grilled crust. Finished with a rich balsamic glaze, this savory-sweet combination offers a bold and satisfying flavor profile, perfect for an elevated backyard meal.